
Tryton is one of the most powerful and flexible ERP platforms. It is built on Python, supports PostgreSQL, and offers a clean web interface through its SAO (Single Application Object) web client. In this step-by-step guide, I will walk you through the complete installation of Tryton 7.8 on a fresh Ubuntu 24.04 Server.
Tryton is a three-tier high-level general-purpose application built on Python. It is used as an Enterprise Resource Planning system for businesses of all sizes. It is best for:
- Inventory & Stock Management
- Accounting & Finance
- Sales & Purchase Management
- Manufacturing
- Party & Customer Management
- Reporting & Analytics
Prerequisites
Before we start the installation, make sure we have an Ubuntu 24.04 LTS fresh server, 4GB RAM, minimum 25GB storage, and sudo or root privileges.
System Update & Upgrade
In Linux, when starting a new installation, we first need to ensure our system is up to date. We can do this using the below command.
sudo apt update && sudo apt upgrade -y
Install Dependencies
Tryton 7.8 requires all dependencies to be downloaded using the below commands.
sudo apt install -y \
  python3 python3-pip python3-venv \
  postgresql postgresql-contrib \
  curl git build-essential \
  python3-dev libpq-dev \
  libxml2-dev libxslt1-dev \
  libffi-dev libssl-dev \
  pkg-config
Node.js 20 Install
To install Tryton 7.8 ERP on Ubuntu 24.04 Server, Node.js version 20 is required. Here we install Node.js 20.
curl -fsSL https://deb.nodesource.com/setup_20.x | sudo -E bash -
sudo apt-get install -y nodejs
Verify:
node --version
npm --version
Expected Output:

PostgreSQL Setup
When setting up PostgreSQL, first we start and enable PostgreSQL.
sudo systemctl start postgresql
sudo systemctl enable postgresql
Now we create database and DB user. Before applying first change password in this command. Replace Your Password with YourPassword.
sudo -u postgres psql << 'EOF'
CREATE USER tryton WITH PASSWORD 'YourPassword';
CREATE DATABASE tryton
  OWNER tryton
  ENCODING 'UTF8'
  LC_COLLATE 'C.UTF-8'
  LC_CTYPE 'C.UTF-8'
  TEMPLATE template0;
EOF
Directory & Python VirtualEnv
Create a directory for Tryton and then set up the virtual environment.
sudo mkdir -p /opt/tryton/{etc,data,webdata,logs}
sudo chown -R $USER:$USER /opt/tryton


cd /opt/tryton
python3 -m venv venv
source venv/bin/activate
Tryton Server + All Modules Install
In this step we install all modules.
cd /opt/tryton
source venv/bin/activate

pip install \
  "trytond==7.8.*" \
  "trytond_party==7.8.*" \
  "trytond_company==7.8.*" \
  "trytond_currency==7.8.*" \
  "trytond_country==7.8.*" \
  "trytond_product==7.8.*" \
  "trytond_account==7.8.*" \
  "trytond_account_product==7.8.*" \
  "trytond_account_invoice==7.8.*" \
  "trytond_account_invoice_stock==7.8.*" \
  "trytond_stock==7.8.*" \
  "trytond_stock_lot==7.8.*" \
  "trytond_purchase==7.8.*" \
  "trytond_purchase_request==7.8.*" \
  "trytond_sale==7.8.*" \
  "trytond_stock_supply==7.8.*" \
  psycopg2-binary
Config File Create
In this config file, replace your password with YourPassword.
cat > /opt/tryton/etc/trytond.conf << 'EOF'
[database]
uri = postgresql://tryton:YourPassword@localhost:5432/
path = /opt/tryton/data

[web]
listen = 0.0.0.0:8000
root = /opt/tryton/webdata
EOF
SAO Web Client Download + Build
In this step we download SAO to the tmp directory, then extract and deploy.
cd /tmp
curl -L "https://downloads.tryton.org/7.8/tryton-sao-7.8.7.tgz" \
  -o tryton-sao-7.8.7.tgz

mkdir -p /tmp/sao_extract
tar -xzf tryton-sao-7.8.7.tgz -C /tmp/sao_extract

rm -rf /opt/tryton/webdata/*
cp -r /tmp/sao_extract/package/* /opt/tryton/webdata/

sudo npm install -g grunt-cli


cd /opt/tryton/webdata

npm install --legacy-peer-deps

grunt
Build Verify:
ls -lh /opt/tryton/webdata/dist/
Expected Output:

Database Initialize + Admin Password Set
First we initialize the database of Tryton, then set the password for Admin.
cd /opt/tryton
source venv/bin/activate


trytond-admin \
  -c /opt/tryton/etc/trytond.conf \
  --database tryton \
  --all
prompts answer:
"admin" email for "tryton" (empty for none): [email protected]
"admin" password for "tryton": ••••••••
"admin" password confirmation: ••••••••
This password is required when logging in on the Tryton home page.
Systemd Service Setup
cat > /tmp/trytond.service << EOF
[Unit]
Description=Tryton Server
After=network.target postgresql.service

[Service]
Type=simple
User=$USER
WorkingDirectory=/opt/tryton
Environment="PATH=/opt/tryton/venv/bin"
ExecStart=/opt/tryton/venv/bin/trytond -c /opt/tryton/etc/trytond.conf
Restart=on-failure
RestartSec=5

[Install]
WantedBy=multi-user.target
EOF
Now we reload our system then enable and start.
sudo mv /tmp/trytond.service /etc/systemd/system/trytond.service

sudo systemctl daemon-reload
sudo systemctl enable trytond
sudo systemctl start trytond
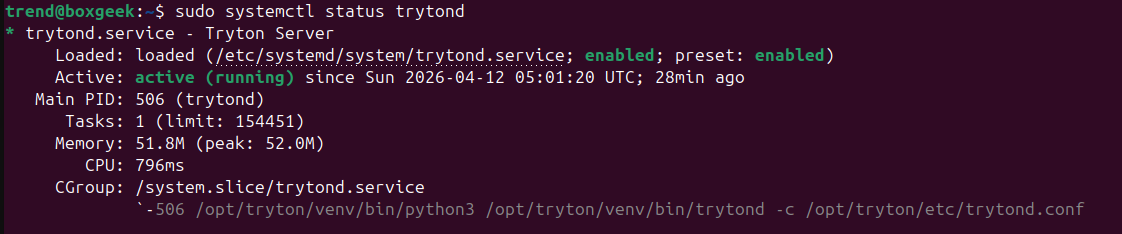
Verify Status:
sudo systemctl status trytond
Expected Output:
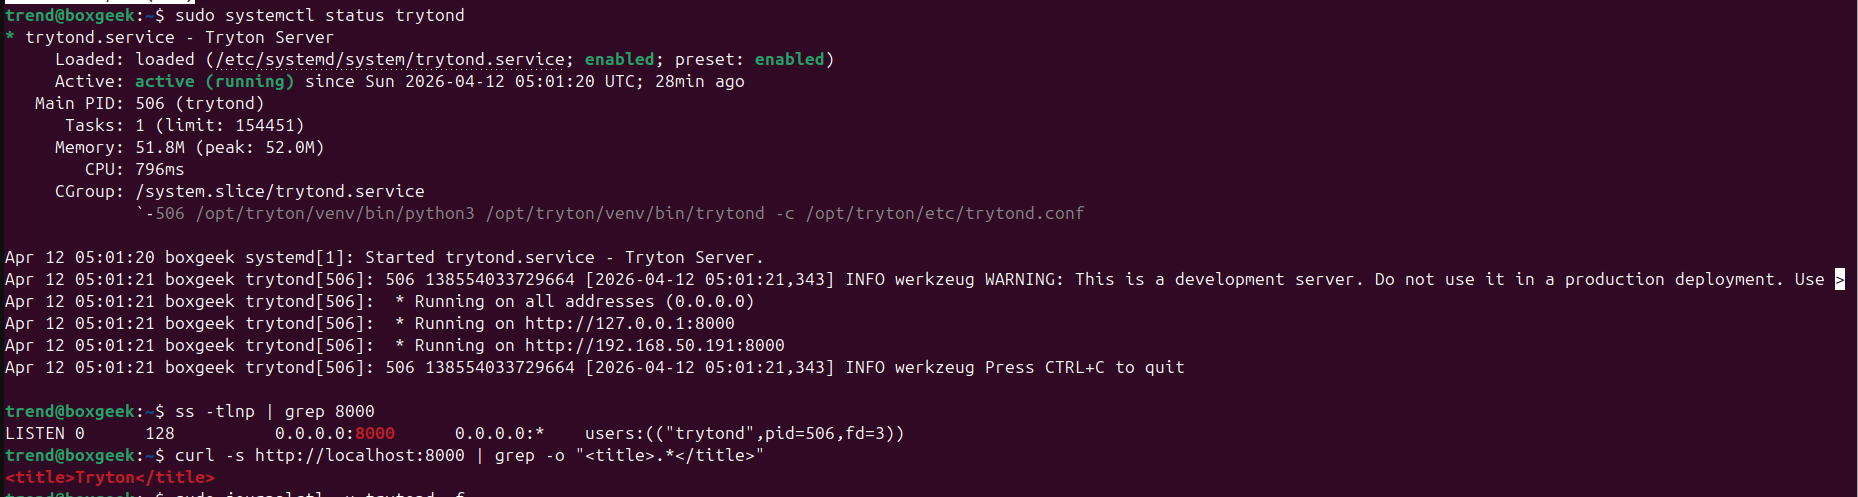
Final Verification
Now we perform the final verification using the below commands.
sudo systemctl status trytond ss -tlnp | grep 8000 curl -s http://localhost:8000 | grep -o ".* "
Expected Output:
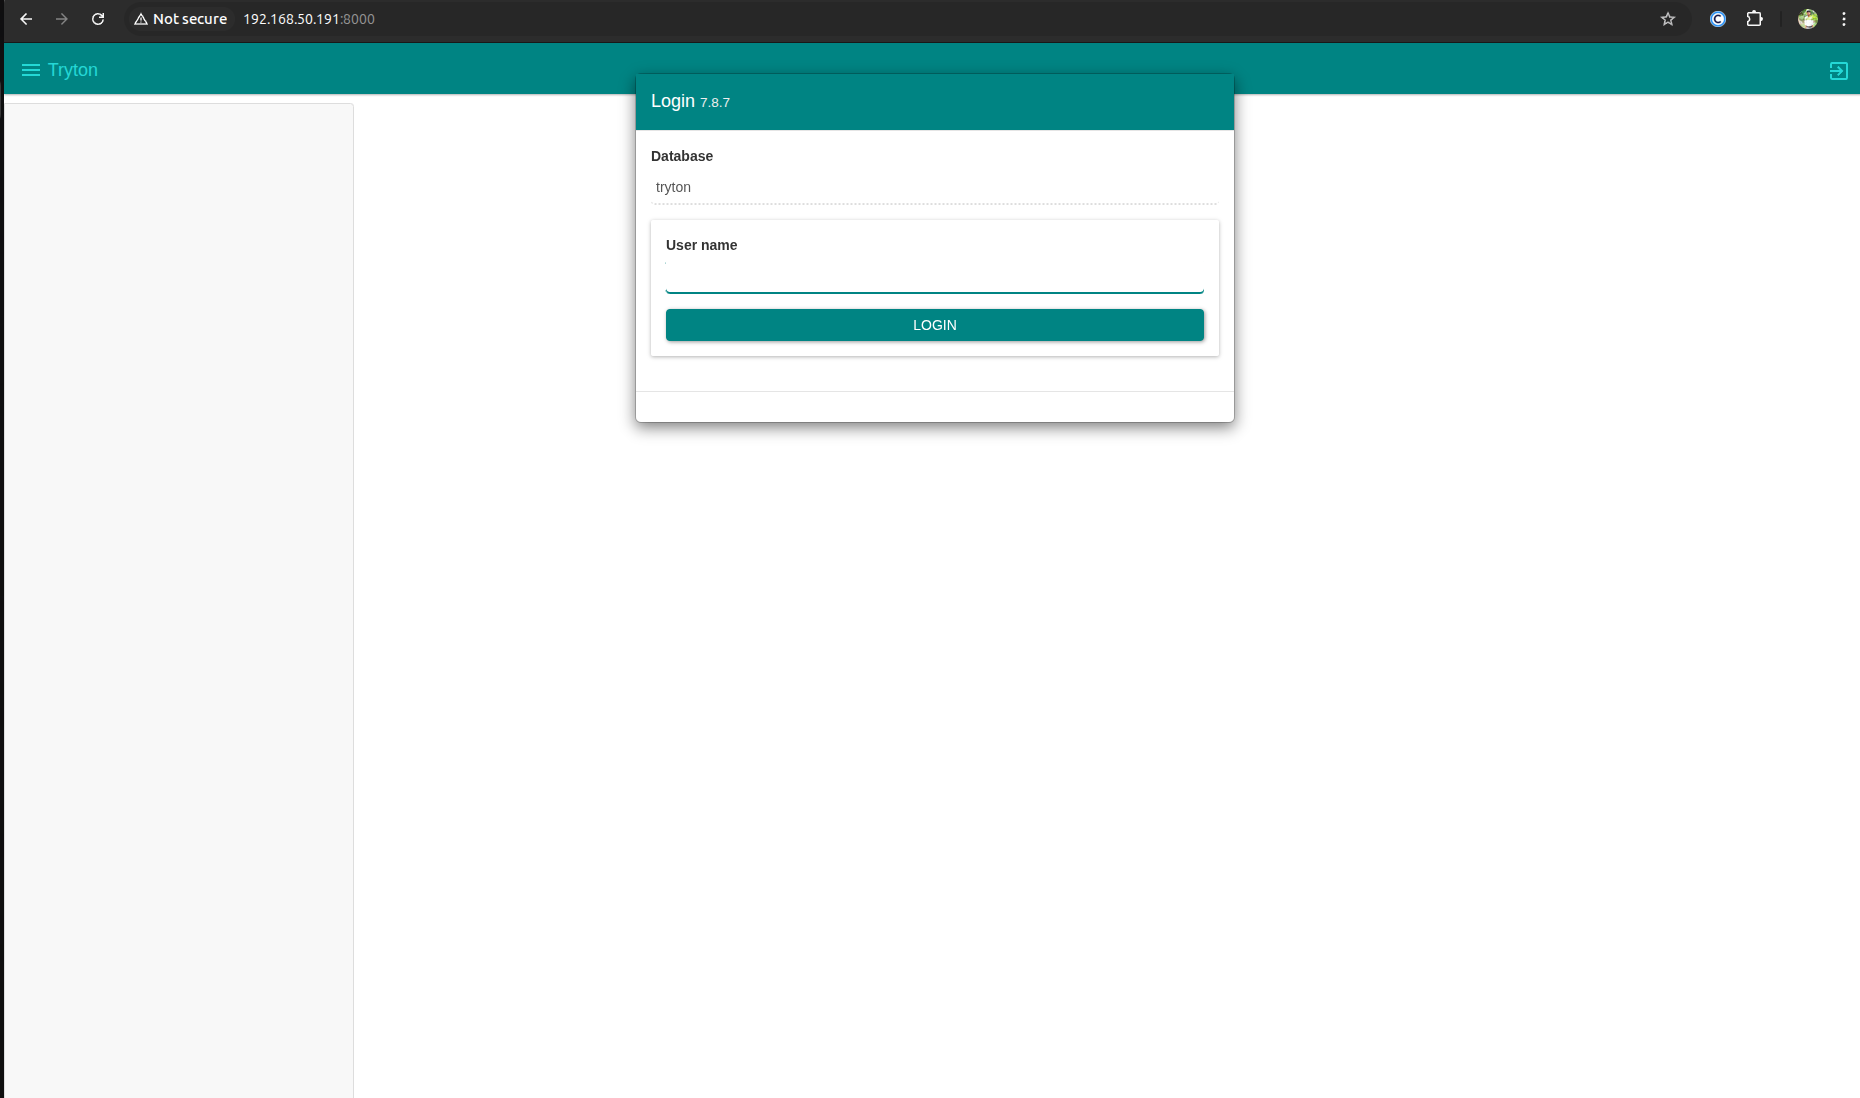
Browser Access
When you paste this in the browser, replace it with your IP address.
http://YOUR_SERVER_IP:8000
Then the home page will open as shown below. Enter the username admin and the password you set up at the Admin Password Set step.
Finally, we have installed Tryton 7.8 ERP on Ubuntu 24.04 Server.
