
If you work with a Linux server, then you know that securing SSH, setting up a firewall, and making sure your file permissions require tight security. But when an application's permissions are weak, it becomes dangerous. File permissions won't save you if the attacker is running as root.
AppArmor solves this problem. It's Ubuntu's default Mandatory Access Control (MAC) system, and it has been quietly protecting the distro for over a decade. I have seen AppArmor act as the fail-safe layer, blocking attackers from reading private information, even when they have gained root access.
Ubuntu 26.04 LTS (Resolute Raccoon) has introduced new quirks you need to know about. This guide covers the practical workflow. I use AppArmor for managing and installing the tools, reading profiles, toggling enforcement, and writing a custom profile to harden a service.
Why Do We Need AppArmor?
For years, I depended on file permissions and user ownership like chmod and chown. It worked beautifully, but it has a fatal flaw: when a process runs as root, it can do anything.
AppArmor fixes this by dictating exactly what an application is allowed to do, regardless of who is running it. Even if attackers take your web server's root access, AppArmor steps in. It blocks the attacker from your SSH keys, because those are not in your web server's approved profile.
Verify AppArmor Status and Install Tooling
Now we install and enable AppArmor on Ubuntu 26.04. To interact with AppArmor easily, we install the utilities package. Before installing anything, first we update our system.
sudo apt update && sudo apt upgrade -y
sudo apt install -y apparmor-utils apparmor-profiles
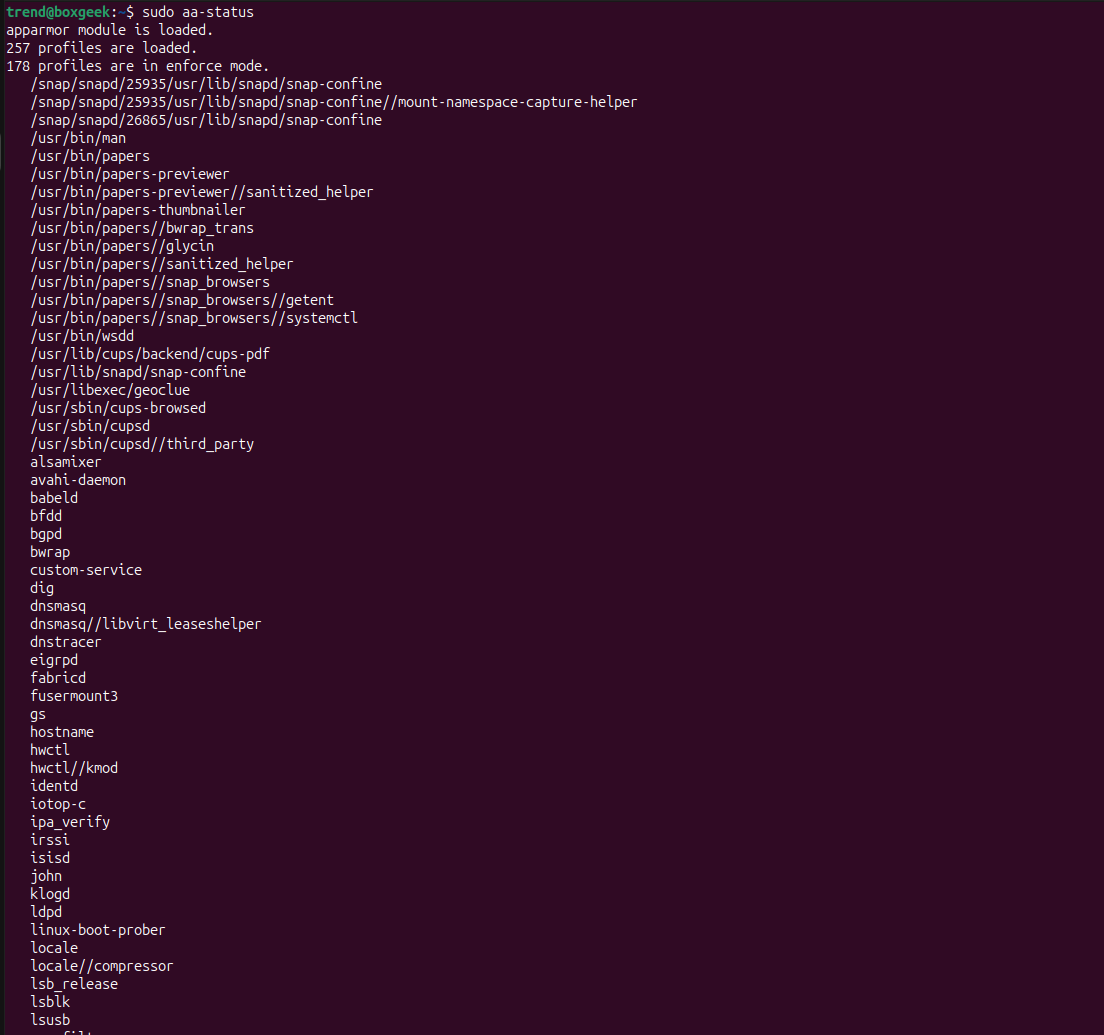
Check the active state of your system:
sudo aa-status
Expected Output:
Anatomy of a Profile: The Ubuntu 26.04 Rust Gotcha
Profiles live in /etc/apparmor.d/. Let's look at a basic profile structure. A profile name mirrors the binary's absolute path, replacing slashes with dots. e.g., /usr/bin/ping becomes /etc/apparmor.d/bin.ping.
Here is a key detail that tripped me up when I first moved to Ubuntu 26.04: Canonical replaced GNU coreutils with the Rust-based uutils rewrite. This significantly impacts AppArmor.
Because AppArmor resolves symlinks before evaluating rules, standard binaries like /usr/bin/cat or /usr/bin/date now resolve to /usr/lib/cargo/bin/coreutils/.
If you write a profile that only allows ixr on /usr/bin/cat, AppArmor will block the execution. Your profile must permit the true Rust binary path.
You can verify this change on your own terminal by checking where standard commands actually point to. Run this command to trace common tools like cat, date, and ls all the way to their final destination:
realpath $(which cat date ls)
On a Ubuntu 26.04 installation, it will return paths pointing to the Rust directory:
trend@boxgeek:/$ realpath $(which cat date ls)
/usr/lib/cargo/bin/coreutils/cat
/usr/lib/cargo/bin/coreutils/date
/usr/lib/cargo/bin/coreutils/ls
That /usr/lib/cargo/bin/coreutils/ path is what AppArmor actually "sees," and why you have to explicitly allow it in your profiles.
Writing and Testing a Custom Profile
The way we have to follow to understand AppArmor is to build a profile from scratch and watch it block root access.
First, we create a dummy script that acts as a service, along with a fake log file and a fake secrets file.
sudo mkdir -p /etc/my-service
echo "super_secret_password" | sudo tee /etc/my-service/secrets.conf
sudo touch /var/log/my-service.log

sudo tee /usr/local/bin/my-service.sh > /dev/null << 'EOF'
#!/bin/bash
echo "Service running..."
cat /etc/my-service/secrets.conf
echo "Log entry" >> /var/log/my-service.log
EOF
Now, we make the script executable.
sudo chmod +x /usr/local/bin/my-service.sh
Next, we create the AppArmor profile. When we look at it, we will notice three key things. First, it starts with the abi <abi/5.0> line. Second, it includes the specific file path for the Rust version of coreutils and the audit deny rule for the secrets file.
sudo tee /etc/apparmor.d/usr.local.bin.my-service.sh > /dev/null << 'EOF'
abi <abi/5.0>,
include <tunables/global>

profile custom-service /usr/local/bin/my-service.sh {
  include <abstractions/base>
  include <abstractions/bash>
  include <abstractions/consoles>

  /usr/local/bin/my-service.sh r,
  /usr/bin/bash ixr,
  /usr/lib/cargo/bin/coreutils/** ixr,

  # Allow writing to a specific log
  /var/log/my-service.log w,

  audit deny /etc/my-service/secrets.conf r,
}
EOF
Finally, load the profile into the kernel and run the script:
sudo apparmor_parser -r /etc/apparmor.d/usr.local.bin.my-service.sh
sudo /usr/local/bin/my-service.sh
Expected Output:

Toggling Modes for Troubleshooting
If a real service breaks after an update, AppArmor is often the culprit. We will switch a profile into complain mode to see if it fixes the issue while keeping logging active.
sudo aa-complain /usr/local/bin/my-service.sh

sudo aa-enforce /usr/local/bin/my-service.sh
Generating Profiles with aa-genprof
Creating AppArmor profiles manually works well for small scripts, but for complex daemons, Ubuntu provides a lifesaver called aa-genprof.
To build a profile for a new application:
First, run the command sudo aa-genprof /path/to/binary on your terminal. Then, open a second terminal to run that program through all of its normal features. Once you finish testing, you return to the aa-genprof prompt and press S to scan the system logs, which prompts you to interactively allow or deny each action the application attempted.
Furthermore, if you update the software later and it needs new permissions, you can simply run sudo aa-logprof to scan the logs and add new rules to your existing profile without starting over.
Reading the Audit Logs
When AppArmor is actively blocking an action in enforce mode, it logs a "DENIED" event.
While regular denials usually happen silently to keep your logs clean, you can force them to show up by using the audit deny rule when building a profile.
In Ubuntu 26.04, you can find these specific logs by checking the kernel memory or the system journal using commands.
sudo dmesg | grep DENIED
OR
sudo journalctl -k -g "apparmor.*DENIED"
Expected Output:
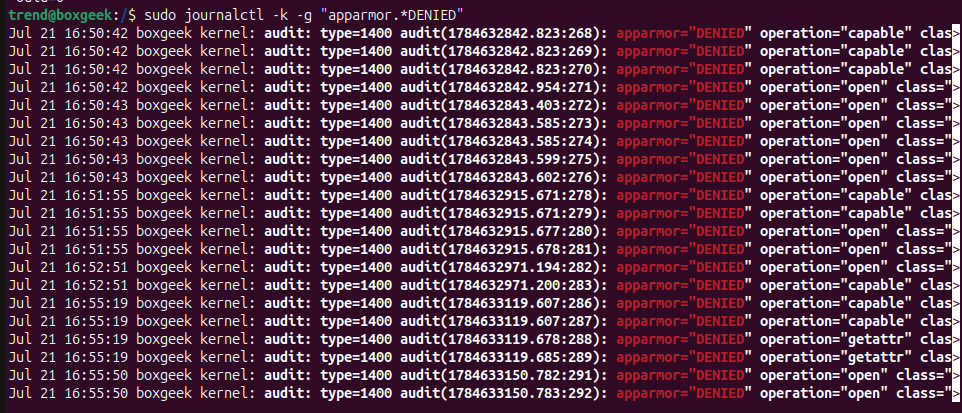
This tells you exactly what profile blocked what action, allowing you to update your profile rules accordingly.
Reloading Rules
When you modify a profile in /etc/apparmor.d/, you must reload it into the kernel.
To check a profile for syntax errors without loading it, run the below command before a reload.
sudo apparmor_parser -QT /etc/apparmor.d/usr.local.bin.my-service.sh
To reload a profile on the fly run below command.
sudo apparmor_parser -r /etc/apparmor.d/usr.local.bin.my-service.sh
To reload all AppArmor profiles, use the below command.
sudo systemctl reload apparmor
A Note on Snaps
Snap packages rely heavily on AppArmor to run safely in their own sandbox. However, their profiles are auto-generated and live in /var/lib/snapd/apparmor/profiles/.
You should never edit these snap profiles by hand. If a snap package needs more permissions, like reading removable media, you must use the built-in snap interface system instead.
sudo snap connect <snap-name>:removable-media
Conclusion
AppArmor is what takes Linux security and turns it into a real, unbreakable wall. It forces the system to obey strict rules. When you take the time to really learn how these tools work, you gain a massive advantage in defending your setup. You just have to keep an eye out for specific updates, like the new Rust coreutils paths that introduced changes in Ubuntu 26.04. AppArmor traps hackers in a tight box even if they compromise one of your applications. This restriction drastically shrinks the blast radius and prevents them from destroying the rest of your server.
