As a DevOps Engineer, going on a trip and enjoying the full day is possible only in the rarest case. If you go on a trip, then putting the laptop in a bag is a first priority. A few days ago, I had gone on a trip and carried the laptop in my bag, but the deployment error was facing my Windows Server. But my Windows Server has no Static IP, then I have not fully enjoyed this trip. If it's not doing with you, then please read this article carefully. Today I will guide you how you can access the Windows Server from anywhere without using any VPN.
In my case, I have a Windows Server on my Homelab. If you use the Ubuntu desktop, then setup Gnome Remote Desktop to access from anywhere.
I have just installed the Cloudflare tunnel. If you need to do the same setup, then follow all my steps. For this setup, you need a Cloudflare Account and one domain. Connect the domain to the Cloudflare Account.
Now, for doing this, go on the Cloudflare Dashboard. In the dashboard, the left side menu shows the Zero Trust option, then click on it. Now you can see the Cloudflare one menu. In the menu, it shows the Network option. You can click on the Network option; in the dropdown menu, it shows Connectors. Now open it.
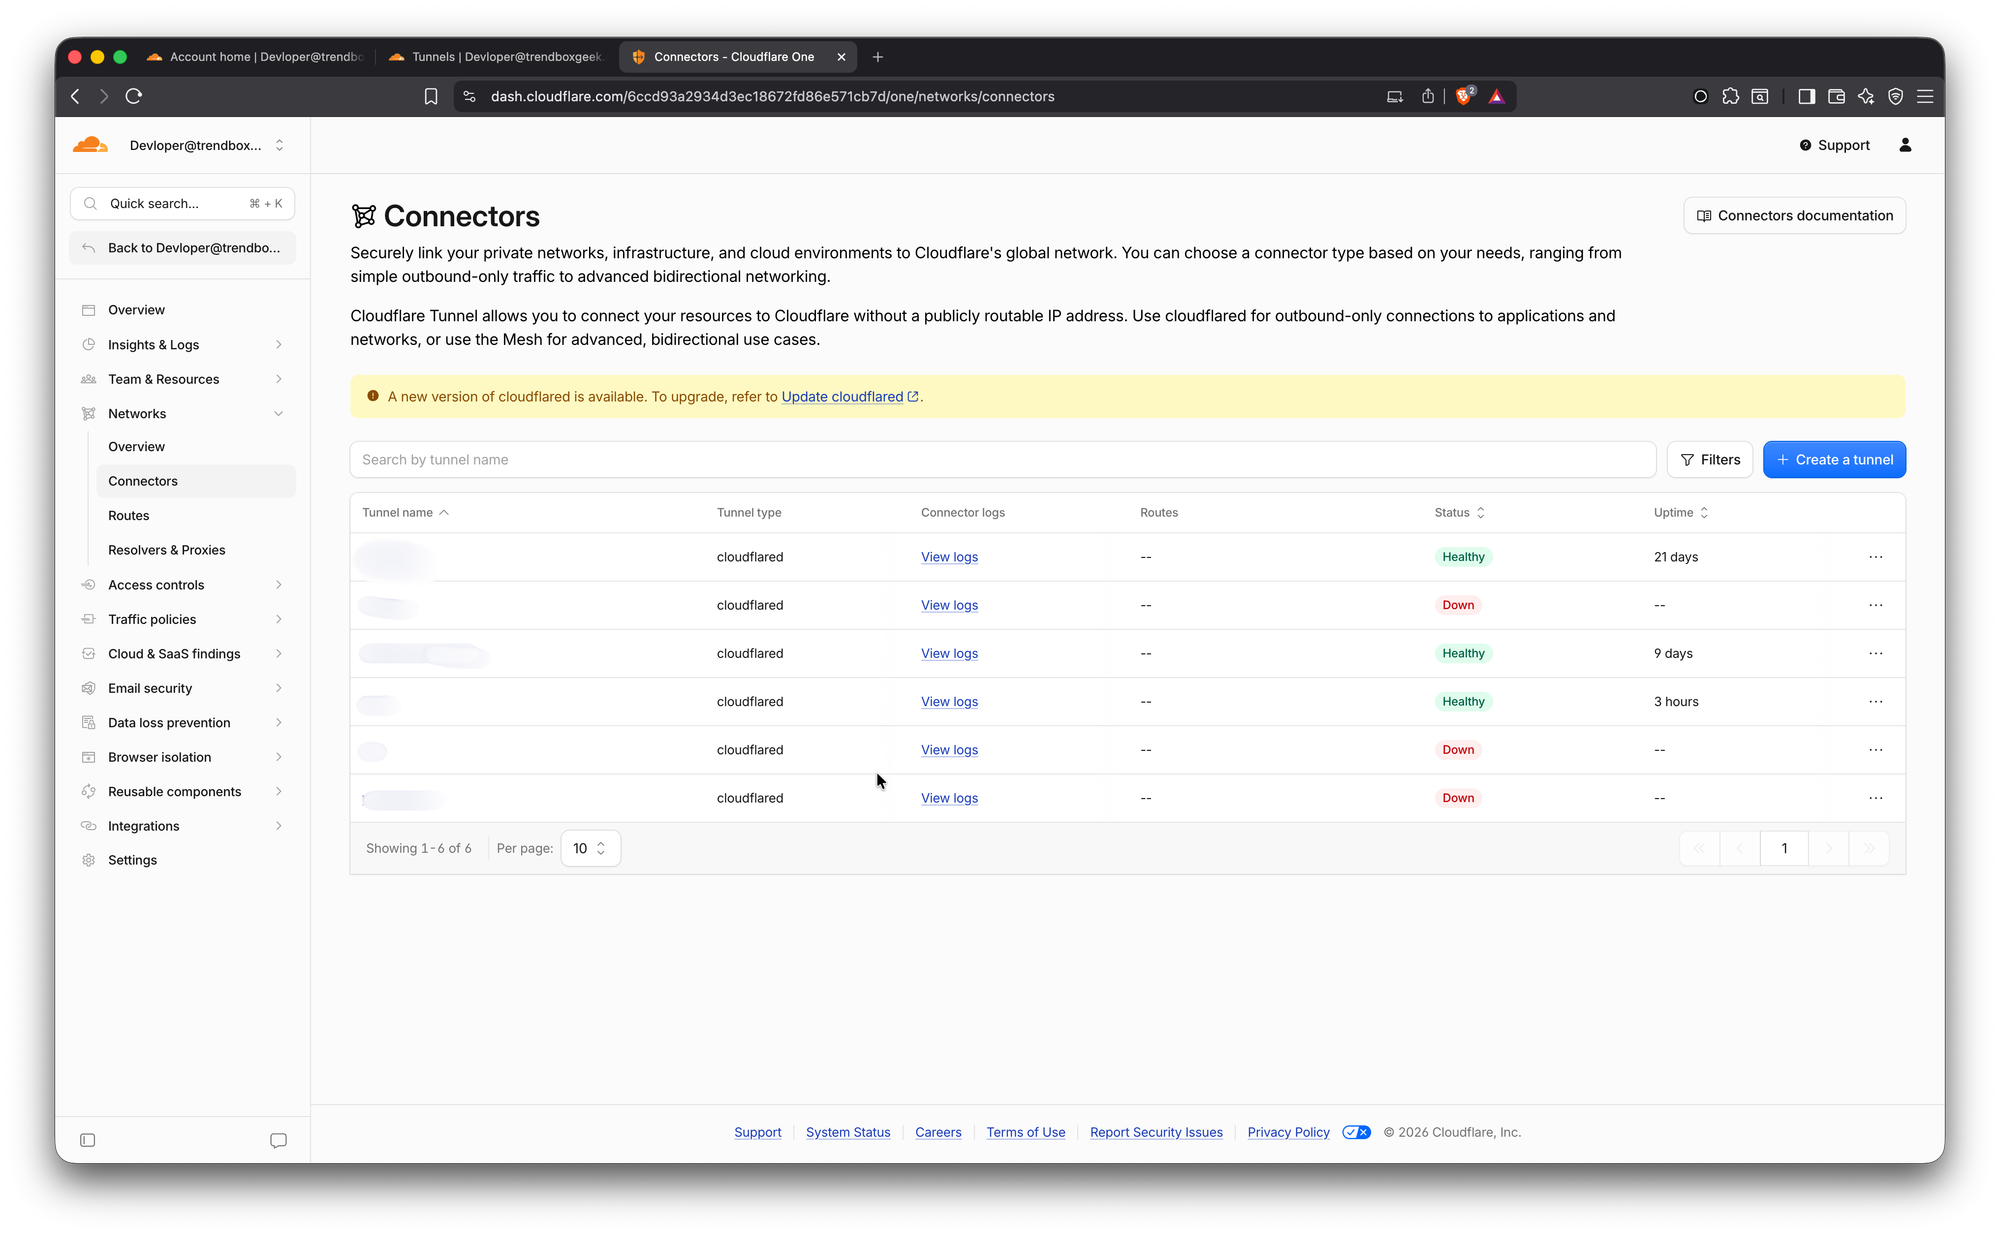
From the image, you can see my existing tunnels. For a new tunnel, click on Create New Tunnel. Now input the name of the tunnel. Then jump to the next step. On the next, you need to select your host device for installing and running the connector.
In my case, I have a Windows Server, then I have selected the Windows Server. Now you need to download the Cloudflared software latest from the given button provided link. Now you can install the software and run the command prompt as an Administrator and run the command with token. Then click on the next. Now here it shows the Route Tunnel page.
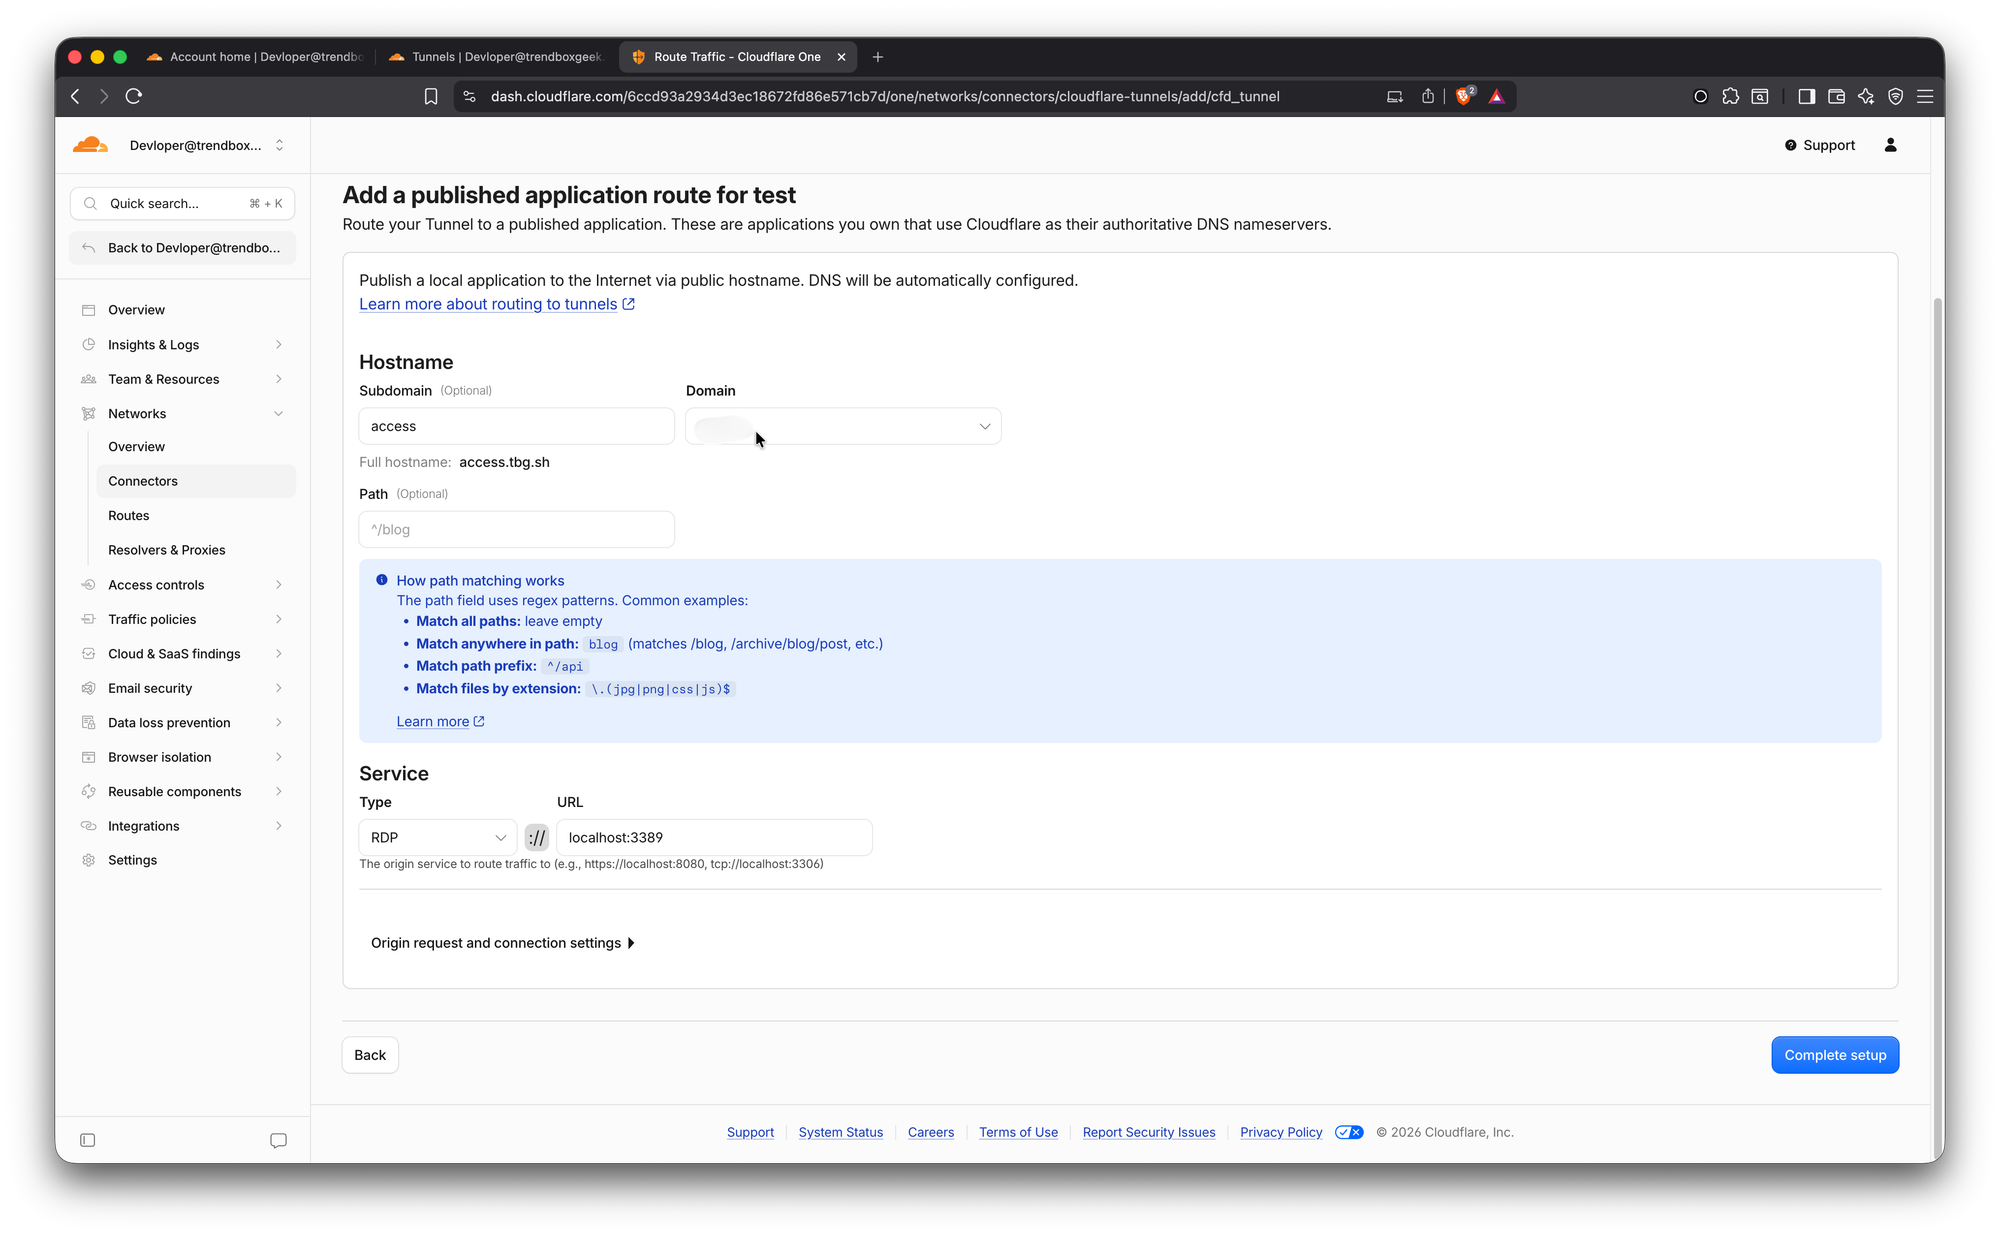
On the hostname section, input the custom hostname. In the subdomain section, input the custom name, then in the domain section, use your domain. Now go to the service section. In the service type, select RDP. And on the URL section, input "localhost:3389", then click on the complete setup. Now our server side configuration is now completed.
How to Access from Remote
Accessing the RDP from the remote is too easy. Now, in your client device, download the Cloudflared software. If you use Windows, then open cmd and run the given command.
cloudflared access rdp --hostname subdomain.yourdomain.com --url rdp://localhost:3389
From the command, you need to replace the subdomain.domain.com with your actual domain. Now open Remote Desktop Client or Windows App, then input localhost:3389 as a host and connect with your username and password.