
If you are spinning up a new Proxmox VM or bare-metal Docker host, clicking "Next" through the default Ubuntu Server installer is a mistake. You end up with a bloated system full of packages you will never use.
Igor's LAB experts say that, if you want a lean, efficient homelab, you need to be doing an Ubuntu Server Minimized install. In this process we remove documentation, human-friendly utilities, and arbitrary localization files. So you are left with a lightweight operating system that is best for running containers and services. It eats less RAM, has a smaller attack surface, and runs apt upgrade in seconds.
But just installing it is not enough. Today, I am walking you through my exact playbook for installing and hardening a minimized Ubuntu server. In this installation we also cover a massive SSH trap in modern Ubuntu that catches almost everyone off guard. So let's build a server that's lean, mean, and secure.
The Installation
Boot up your standard Ubuntu Server ISO. You don't need a special download for this — "Minimized" is just an option in the regular installer.
Network Setup: Don't leave this on DHCP. Select your interface, go to IPv4 -> Manual, and set a static IP.
The Golden Toggle: When it asks for your base system, switch it from the standard server to "Ubuntu Server minimized".
Storage: If you don't know logical volumes, then uncheck "Set up this disk as an LVM group." A standard ext4 partition is faster and much easier to recover if your homelab crashes.
SSH: Check the box to "Install OpenSSH server" so we can remote in later.
Snaps: We want to install Docker natively, not as a Snap package, to avoid weird networking conflicts.
Reboot the machine, pull the ISO, and log in.
The Post-Install Hardening Playbook
A fresh new install is basically always insecure against attacks. So we are going to lock this down right now.
Automate the Boring Stuff
First, update the system and make sure security patches install themselves so you don't need to always watch.
sudo apt update && sudo apt upgrade -y
sudo apt install unattended-upgrades -y
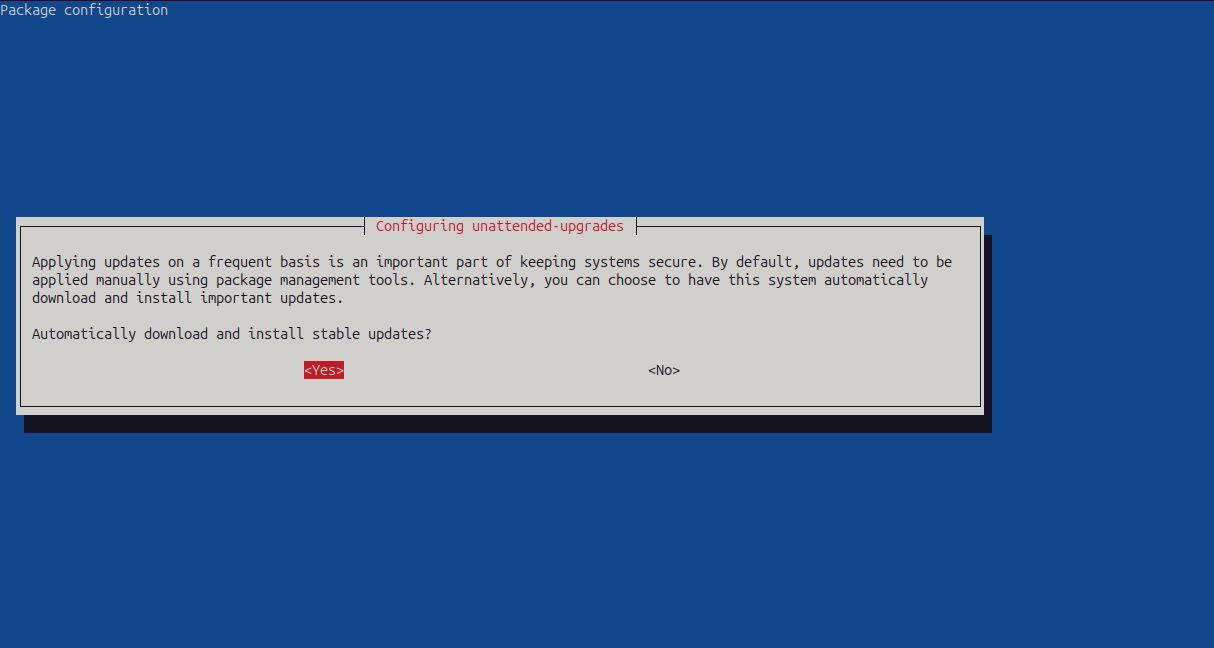
sudo dpkg-reconfigure --priority=low unattended-upgrades
Hit "Yes" when prompted, as shown in the screenshot.
The Great SSH Trap
We need to disable password logins and change the default SSH port. But first, from your local desktop (not the server), push your Ed25519 SSH key to the new server so you don't lock yourself out.
ssh-copy-id username@your_server_ip
Now, back on the server, let's write a strict SSH config.
sudo nano /etc/ssh/sshd_config.d/99-custom.conf
Paste the code below into your file. I am using port 2222, but you can pick whatever you like.
Port 2222
PermitRootLogin no
PasswordAuthentication no
PubkeyAuthentication yes
Note: If you are on Ubuntu 24.04 or 26.04, simply restarting SSH right now will do absolutely nothing. Modern Ubuntu uses systemd socket activation for SSH, which aggressively binds to port 22 and ignores your custom config. You will just get a "Connection refused" error when you try to log in.
To apply your custom port, you have to kill the socket and switch back to the classic SSH service.
sudo systemctl disable --now ssh.socket
sudo systemctl enable --now ssh.service
sudo systemctl restart ssh
Important: Do not close your current terminal window yet! Open a new tab on your local machine and test the new connection using ssh -p 2222 username@your_server_ip to make sure it works first.
Slam the Door with UFW
Let's enforce a default-deny rule, making sure to allow our new SSH port first.
Note: Be sure to change 2222 in your command below; use the port you chose in your SSH config file, otherwise UFW will block your connection.
sudo apt install ufw -y
sudo ufw default deny incoming
sudo ufw default allow outgoing
sudo ufw allow 2222/tcp
sudo ufw enable
Fix Your Fail2Ban Setup
Most tutorials tell you to edit jail.local. But don't do this — it gets messy. Use the jail.d directory.
Also, Ubuntu uses systemd for its logging, so Fail2Ban won't actually be able to read your SSH logs unless you install the Python systemd backend.
sudo apt install fail2ban python3-systemd -y
sudo nano /etc/fail2ban/jail.d/99-custom.local
Add this block so it monitors your custom port using the correct backend.
[sshd]
enabled = true
port = 2222
filter = sshd
backend = systemd
maxretry = 3
findtime = 600
bantime = 3600
Enable it and start it up:
sudo systemctl enable fail2ban
sudo systemctl restart fail2ban
Expected Output:

Kernel Lockdown
Finally, let's tweak the kernel to ignore ping floods, block spoofing, and disable IPv6.
sudo nano /etc/sysctl.d/99-security.conf
Paste this block into the file.
net.ipv4.icmp_echo_ignore_broadcasts = 1
net.ipv4.tcp_syncookies = 1
net.ipv4.conf.all.accept_redirects = 0
net.ipv4.conf.all.send_redirects = 0
net.ipv6.conf.all.disable_ipv6 = 1
net.ipv6.conf.default.disable_ipv6 = 1
To apply it live, run the command below.
sudo sysctl -p /etc/sysctl.d/99-security.conf
Expected Output:

Wrapping Up
That’s it. You now have a hyper-efficient, minimized server that’s practically bulletproof against basic attacks. Your RAM usage will stay flat, and bots won't be able to brute-force your standard SSH port.
