
Debian 13 Server is a solid choice for running stable, secure workloads, and Proxmox VE makes it easy to deploy as a virtual machine. In this step-by-step guide, you will learn how to download the ISO and create a VM of Debian 13 Server. Then your Debian server will be ready for web hosting, Docker containers, or general infrastructure use.
Requirement
- Proxmox Server Access
- Internet connection
- Debian 13 Server's ISO
- Click here to download the 64-bit (amd64) Debian 13 server ISO click
Creating Debian 13 Server's VM
First, go to the Proxmox server home page. If your local name is pve, then click on local(pve). After clicking on local pve, some options will open. Find ISO images and click on them. If you downloaded the ISO locally, then upload it here; otherwise, if you have an ISO image link, click on Download from URL and the ISO image will appear here. After the ISO image downloads, follow the steps below.On the Proxmox server's home page, find "Create VM" at the top and click on it.
Create Virtual Machine
General
Creating a virtual machine of Debian 13 server on Proxmox. In the general section, select VM ID like 101 and Name like debian13-server. Then click on NEXT.
OS (Operating System)
In the operating system section, storage option select local. In the ISO image section, select your ISO and Type must be set to Linux. Then click on NEXT.
SYSTEM
In the system section, Graphic card default, Machine q35, BIOS SeaBIOS, and SCSI controller select VirtIO SCSI option, then click on NEXT.
Disks
In the disk menu, select storage local-lvm and Disk size (GiB) like 16 (you can choose according to your requirement). Then click on NEXT.
CPU
In the CPU section, socket select 1 and Cores select 2 (if you select more than 2, your VM will run smoother) and Type select Host. Then click on NEXT.
Memory
In the memory section, you can choose memory according to your usage, but select a minimum of 4096. Then click on NEXT.
Network
In Network section Bridge option select vmbr0. Then click on NEXT.
Confirm
Here, all the options you chose are shown step by step. If any changes are required, reselect them and then click on Finish.
After clicking on Finish, your VM will appear on the Proxmox home page. Click on your VM. When you click on your VM, many options will appear. Then click on Console.The following options will be shown.
Debian 13 server installation
Debian GNU/Linux installer menu (BIOS mode)
- Graphical install
- Install [select this one]
- Advanced options
- Accessible dark contrast installer menu
- Help
- Install with speech synthesis
On the next screen, select a language and click on Continue.
Then select your location and click on Continue.
Then select Configure the keyboard and click on Continue.
Configure the network
To configure your network, enter a unique hostname for your device, such as "debian13", and then provide the appropriate domain name.
If you don't have any ideas, leave it blank and click on Continue.
Set up users and passwords
- Root password
- Enter your password here
- Re-enter your password here
- Then click on Continue.
Set up users and passwords
In the previous step, you set the password for root; here you set it for users. First, enter your username and then set the password for your user. Then click on Continue.
Partition disks
In this part, select the option as shown in the image.
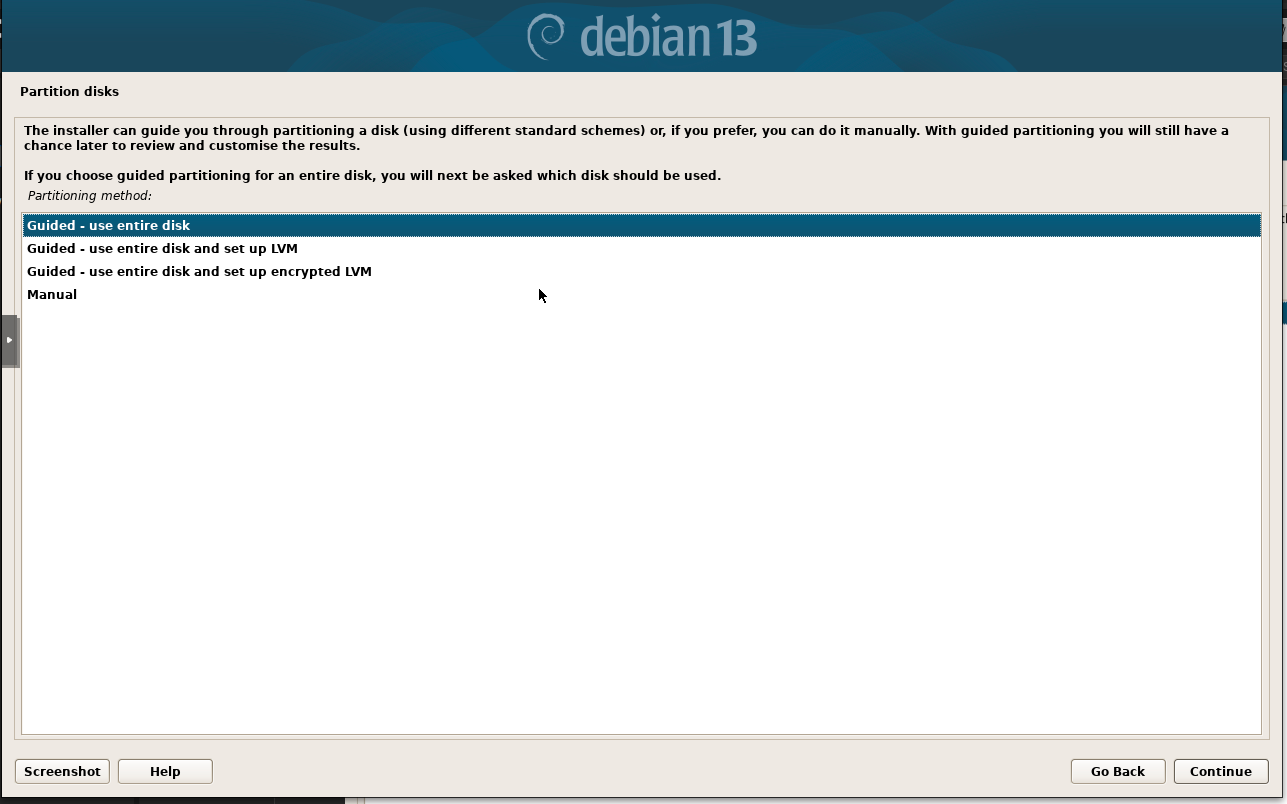
In the next step, click on Continue and move forward.
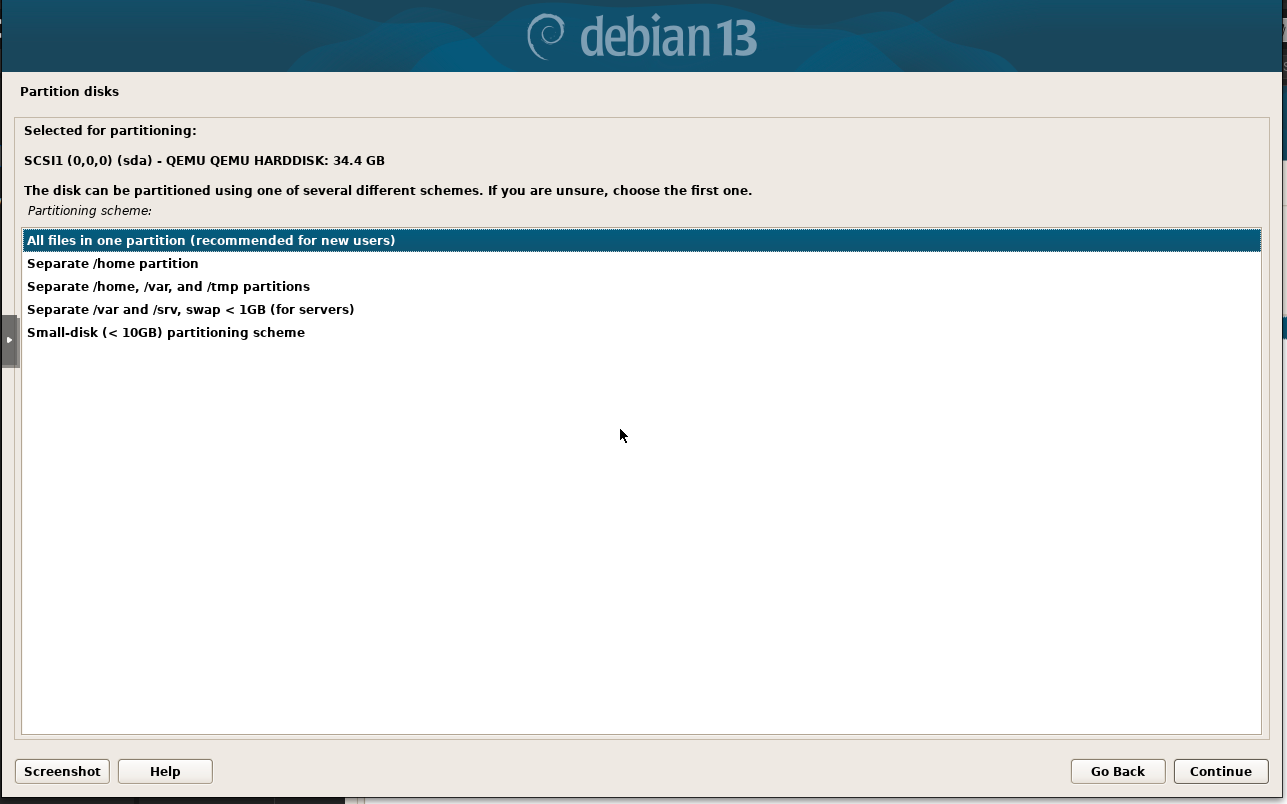
Then in the next step, select the option as shown in the image.
After this step, the next step will be shown. Select as shown in the image and then click on Continue.
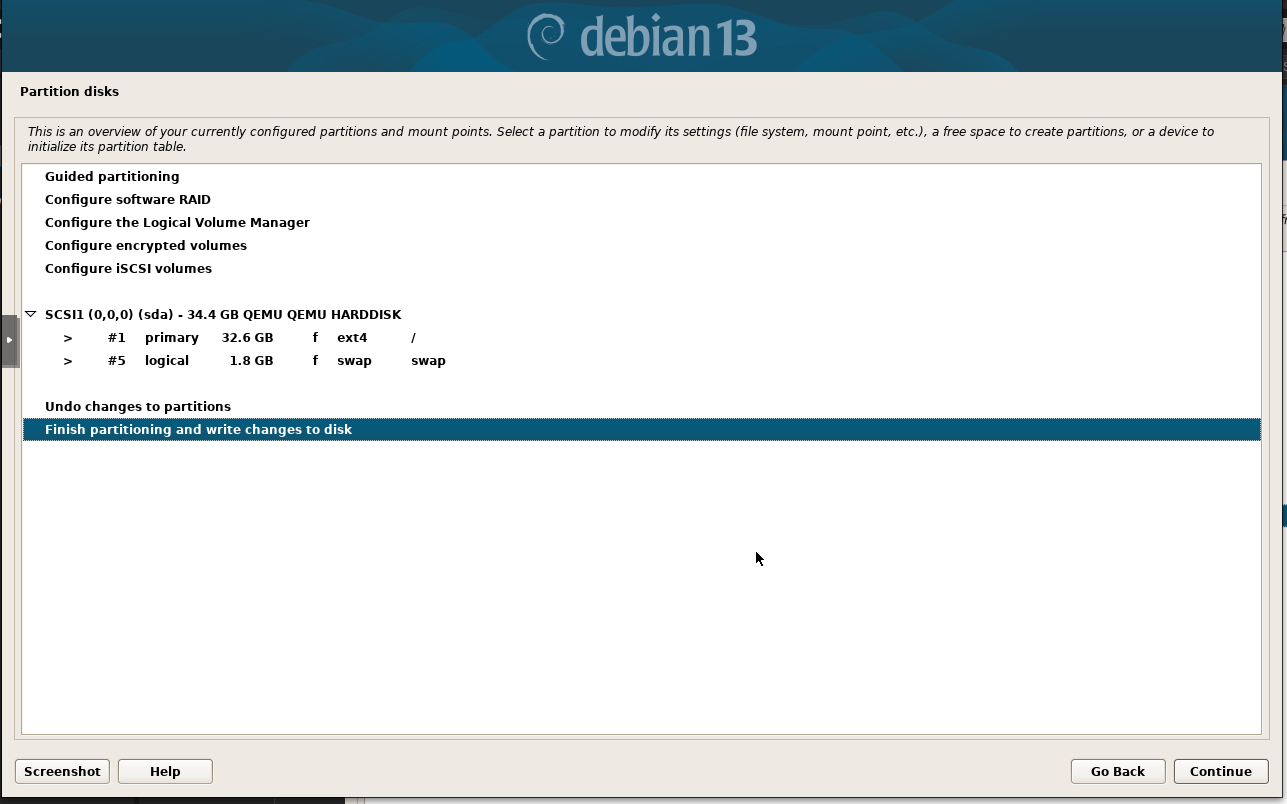
After this selection, the next step must be to select Yes. Then click on Continue.
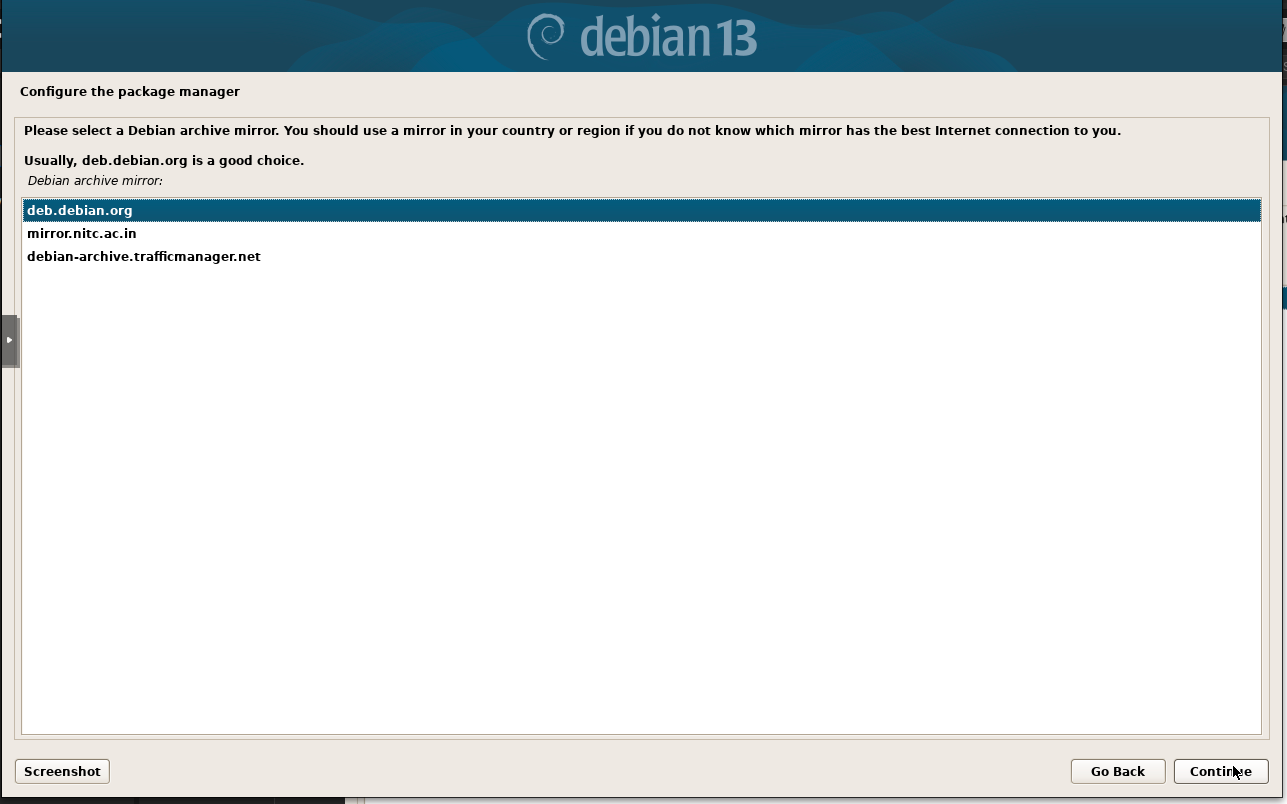
Configure the package manager
If you wish to scan more media, please insert another one now.Scan extra installation media?
NO [select NO]
Yes
Then click on Continue. After this, the next step is to select your country, then click on Continue.
In the next step, leave it blank and click on Continue.
Configuring popularity-contest
Participate in the package usage survey?
[*] NO
[ ] Yes
Then click on Continue.
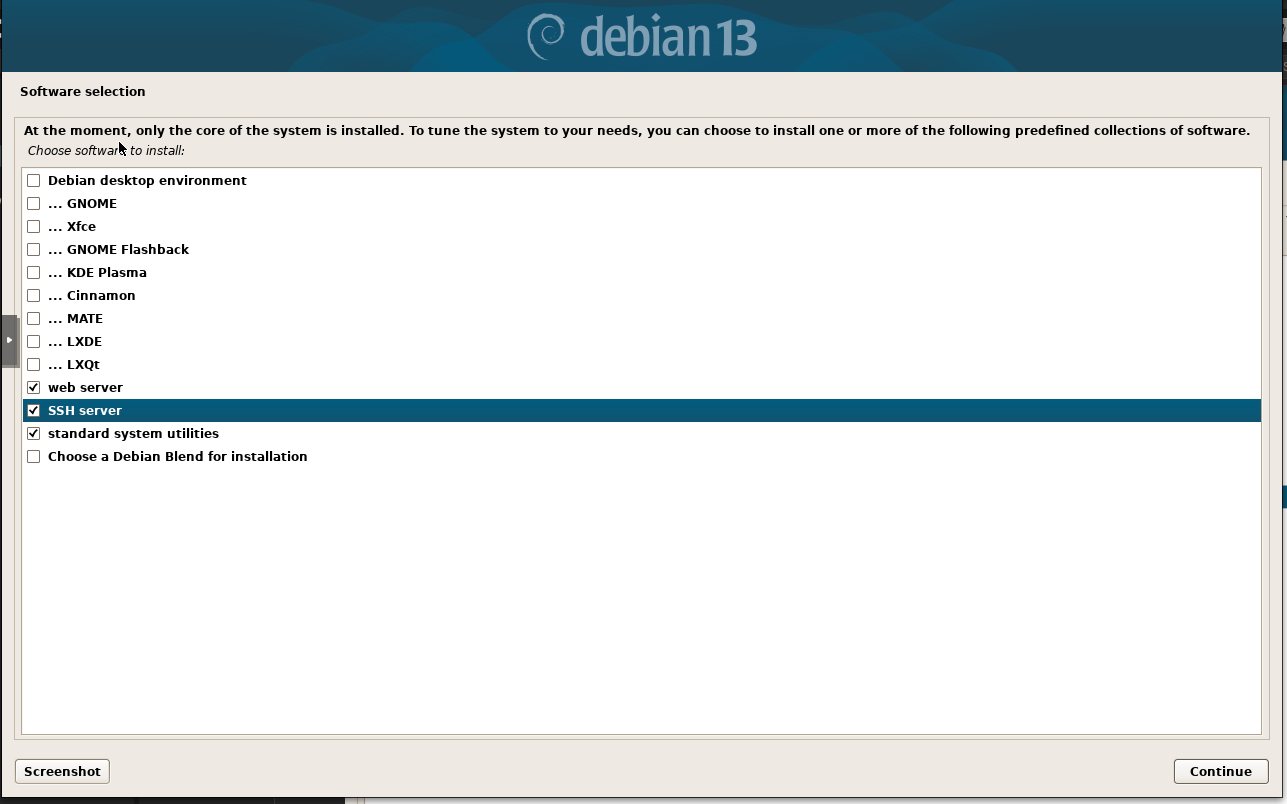
This is the most important step. Select the options shown below carefully.
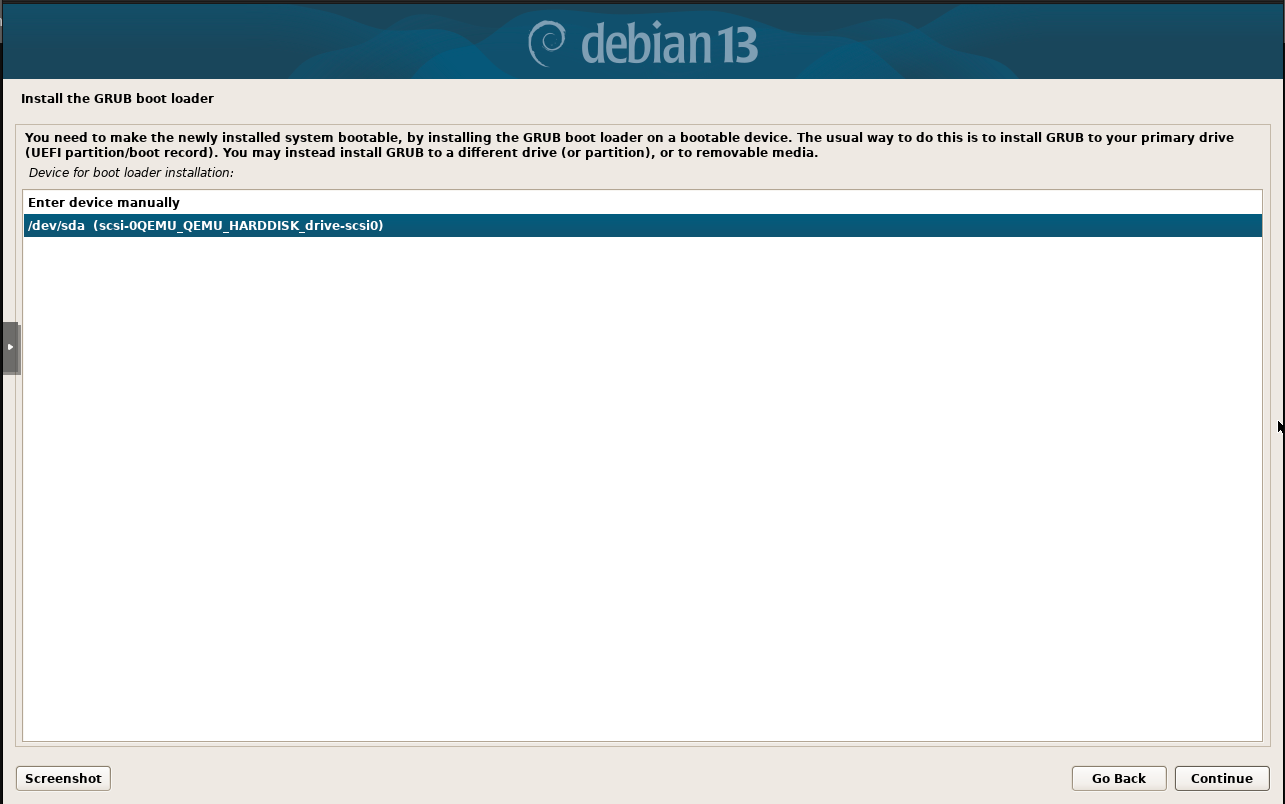
Install the GRUB boot loader
Install the GRUB boot loader to your primary drive?
NO
YES [*]
Then click on Continue.
In the next step, select the option as shown in the image below.
Then click on Continue.
Finish the installation here and click on Continue and remove installation medium.
Your Debian 13 server is now ready.
