
Normally people use Vercel as a SaaS platform for website deployment, or in business they use it for AI agents with zero infrastructure management and to scale web applications. When your usage grows, you need to pay more money for a subscription, which is why some businessmen are looking for its open source alternative. Today, Coolify is an open source Platform as a Service (PaaS). You can install it for free on your local server.
Here is the exact way to install Coolify on a fresh Ubuntu 24.04 server.
Prerequisites
First, you need a Proxmox homelab or a cloud VPS. Then create a VM of Ubuntu 24.04 LTS. In the VM, you require a minimum of 2 vCPUs, 2GB of RAM, and at least 30GB of storage. For Coolify installation, you need SSH access, and if you plan to expose it securely on the web, then you need a domain name.
Step-by-Step Installation
Coolify's setup is easy and straightforward. First, connect to your VM via SSH to easily run commands.
System Update & Upgrade
In any Linux distribution, if you want to install any tools or applications, you need to set your system to update and upgrade. For your Ubuntu 24.04 server, update and upgrade by following the command below.
sudo apt update && sudo apt upgrade -y
Install Dependencies
First, make sure your packages are up to date, then install curl. For installing curl, use the command below.
sudo apt update && sudo apt install curl -y
After installing curl, your Ubuntu server is now ready for installing Coolify.
Coolify Installer
Paste the command below in your terminal, and in a few minutes your Coolify will be installed. The installation takes some time, so wait and watch the installation.
curl -fsSL https://cdn.coollabs.io/coolify/install.sh | sudo bash
Open the Firewall for Local Access
If you are running Uncomplicated Firewall (UFW) on Ubuntu, expose the port so you can reach the web interface. For that, follow the command below.
sudo ufw allow 8000/tcp
When you paste this command in your terminal, the output will look like the image below.

Accessing Your Dashboard
When the installer finishes, it outputs a "Public IPv4" address like the image below. But if you are hosting this at home on an ISP like Jio AirFiber or BSNL Broadband, that public IP will not work.
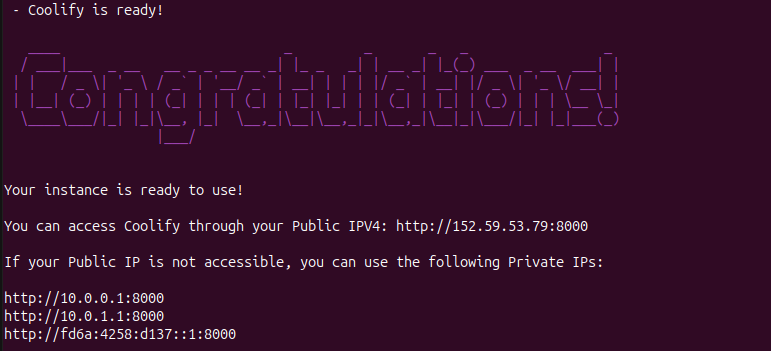
Most modern home ISPs use CGNAT, meaning you don't have a dedicated public IP address, and you can't port-forward from your router to the outside world. For that, here are two scenarios to help you decide which way to go.
Scenario A: Accessing at Home (Local Network)
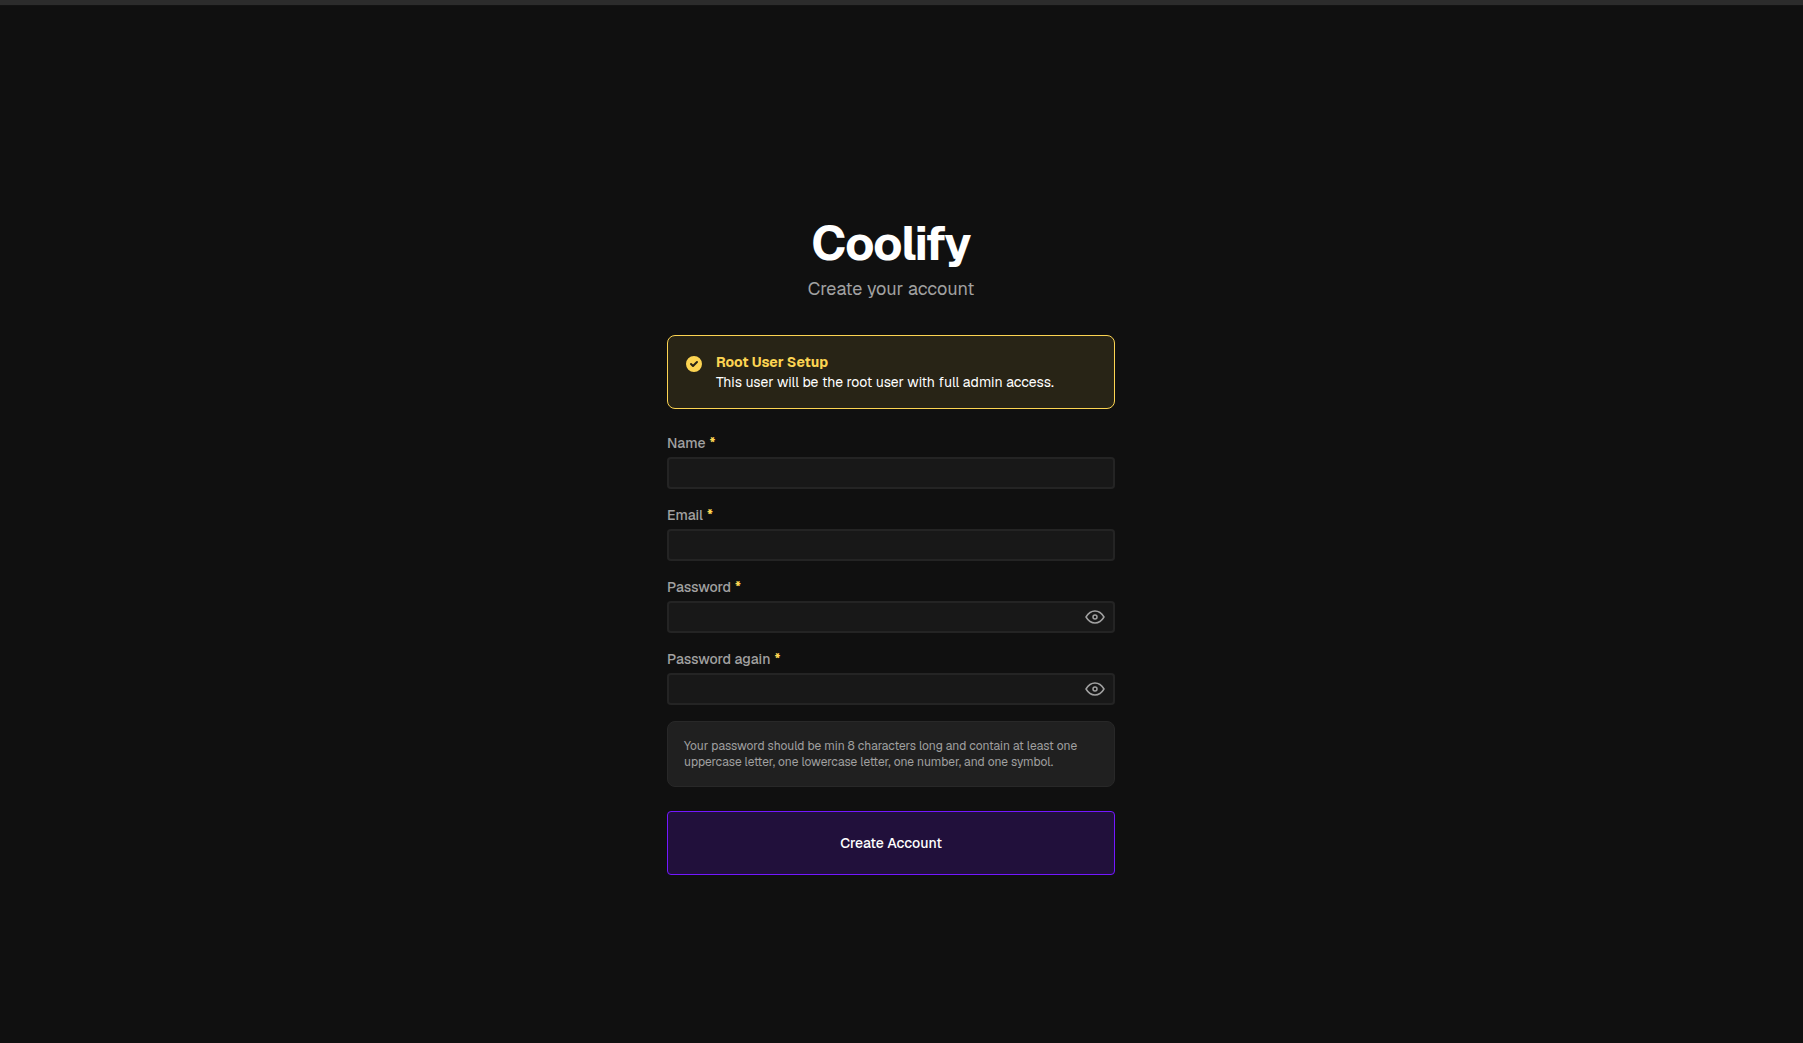
If you are connected to the same Wi-Fi network where your server is connected, then ignore the public IP. Just type your server's IP address and port 8000 in your browser, like http://192.168.55.123:8000. Then your Coolify home page will open like the image below, and you can create your admin account.
Scenario B: Accessing Outside the Home
If you want to securely access your Coolify dashboard from anywhere in the world, you need to bypass your ISP's CGNAT. Do not try to fight your router's port forwarding settings. Instead, use a Cloudflare Tunnel. It's free and creates an outbound connection from your server to Cloudflare's network, effectively punching a secure hole through CGNAT. To create a Cloudflare Tunnel, follow the method below.
Create a free Cloudflare account and move your domain's DNS to Cloudflare.In the Cloudflare dashboard, go to Networking and select Tunnels, then a page like the one below will open. Create a new tunnel, select Cloudflared, and copy the installation command provided.
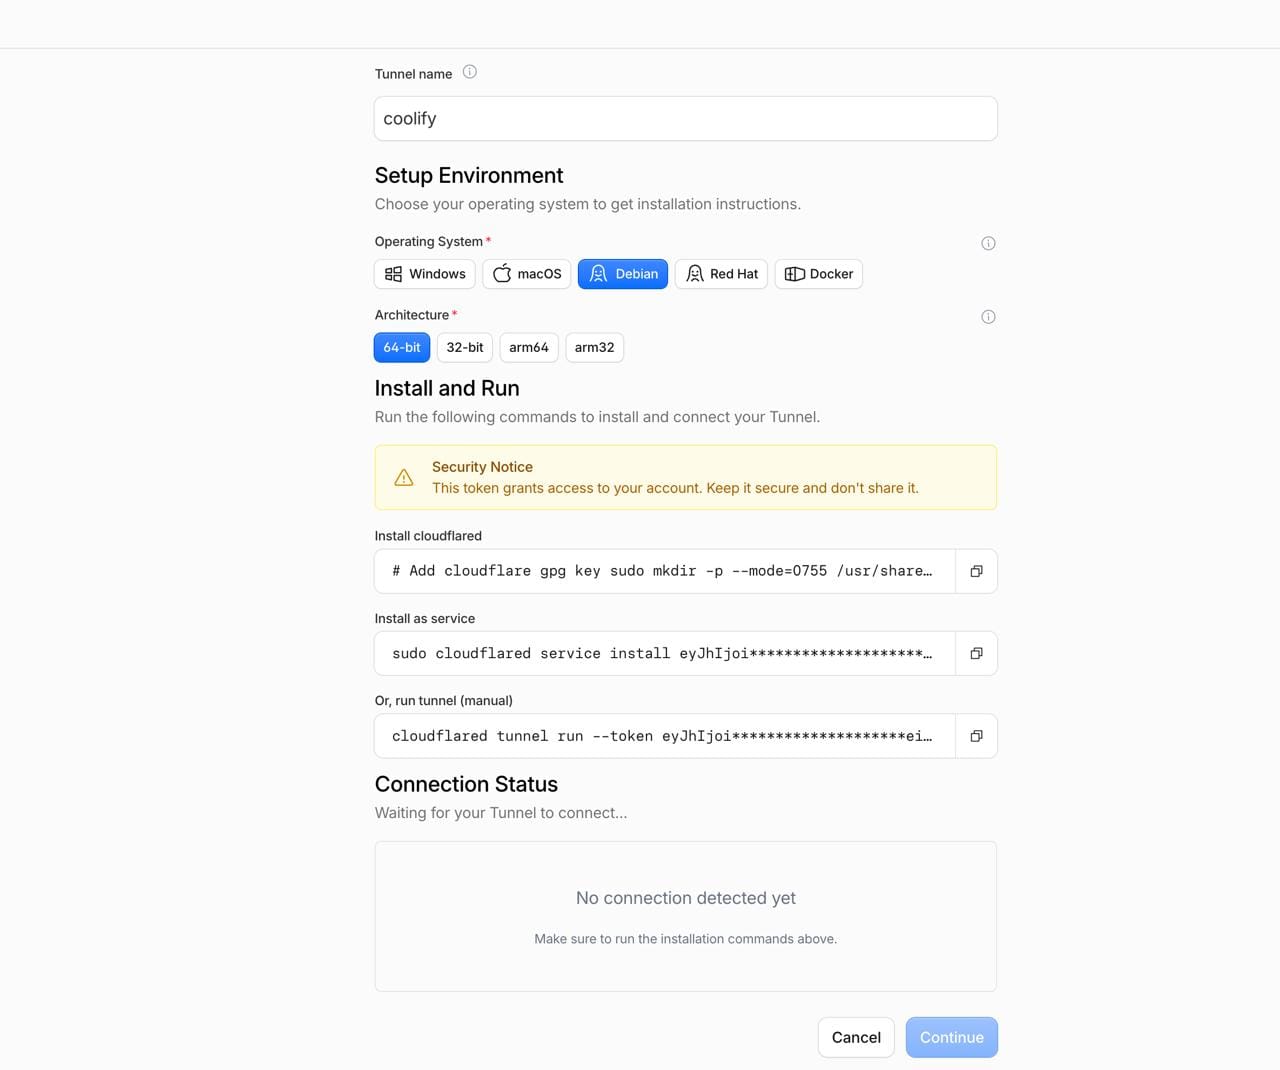
Select and paste it in your Ubuntu server's terminal to install the connector. Then go back to Cloudflare and route a subdomain like coolify.yourdomain.com to your server's local IP. Then, when you enter coolify.yourdomain.com in your browser, your Coolify home page will open.
You now have secure, HTTPS-encrypted remote access to your Coolify from anywhere in the world, without exposing your home network directly to the public web.
