
Your homelab setup is a simple Proxmox server for Pi-hole. In this setup, you are running a bunch of Docker containers and you don't know why your RAM is maxed out. In this situation, you need a self-hosted tool to monitor your server.
Some people advise you to use Prometheus and Grafana for this monitoring. But the reality is that running a massive enterprise observability stack just to watch your media server is total overkill. Grafana is a big tool, so you need to be burned out to maintain it, or Uptime Kuma is lightweight but only answers "is my site online?". This is not an ideal answer for your homelab.
Beszel fixes this. It is lightweight like Uptime Kuma and provides deep resource insights like Grafana. Here is a breakdown of why Beszel is the ultimate homelab monitor and a complete step-by-step guide to installing it on your server.
Why Choose Beszel for Homelab Monitoring?
Here is why Beszel is the ultimate headache-free homelab monitor.
Simple and Lightweight
Beszel is a tiny binary tool that requires almost zero resources. It is easy to set up. It requires no public internet exposure.
Docker and Podman Stats
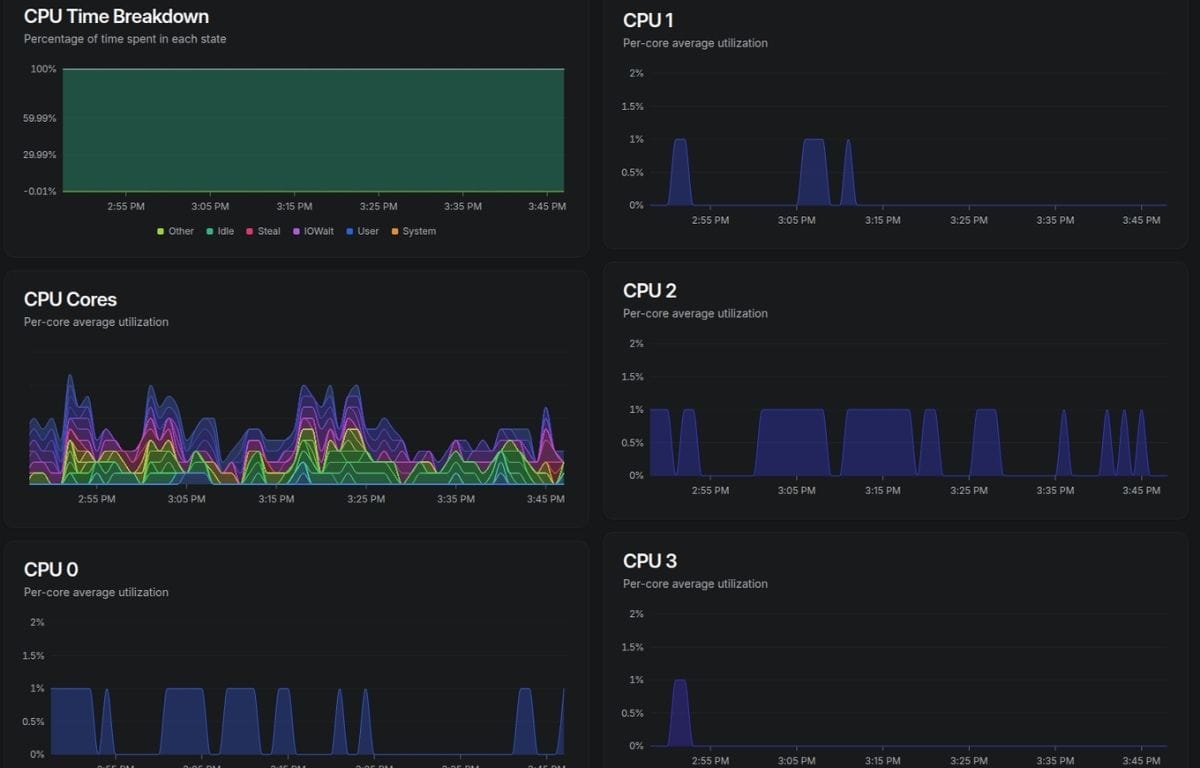
This is the feature that makes it a must-install. Beszel tracks CPU, memory, and network usage for every single container. This makes it easy to monitor which service is consuming the most resources on your host.
Smart, Configurable Alerts
When something breaks in your system, you can easily see where the exact problem is. You don't need to fully understand PromQL. Beszel features simple, configurable alerts for CPU, memory, disk, bandwidth, temperature, and general system status.
Multi-user with OAuth / OIDC
Beszel uses PocketBase to support multi-user OAuth/OIDC authentication. If you share your infrastructure, each user can manage their own systems. Users can authenticate using self-hosted services or public providers, with user creation enabled by setting USER_CREATION=true.
Private and Secure
Beszel handles backing up and restoring data automatically, whether you are working with your local disk or any S3-compatible cloud storage. It includes a built-in REST API, so you can easily grab your metrics to use in your own custom scripts or personal dashboards.
Now we will look at how to install Beszel. To install Beszel on your homelab server, follow the guidance below.
How to Install Beszel
Installing Beszel is straightforward. You can set up both the Hub and the Agent on the same Ubuntu/Debian server using Docker Compose. In this guide, we install Beszel on an Ubuntu 24.04 server.
Update system and install prerequisites
In any Linux distribution, when we install any tool, we first need to update and upgrade our system. So here we update and upgrade our Ubuntu server.
sudo apt update && sudo apt upgrade -y
sudo apt-get install -y ca-certificates curl
Install Docker
After updating your system, you have to install Docker using the official repository.
sudo install -m 0755 -d /etc/apt/keyrings
sudo curl -fsSL https://download.docker.com/linux/ubuntu/gpg -o /etc/apt/keyrings/docker.asc
sudo chmod a+r /etc/apt/keyrings/docker.asc
echo "deb [arch=$(dpkg --print-architecture) signed-by=/etc/apt/keyrings/docker.asc] https://download.docker.com/linux/ubuntu $(. /etc/os-release && echo "$VERSION_CODENAME") stable" | sudo tee /etc/apt/sources.list.d/docker.list > /dev/null
sudo apt-get update
sudo apt-get install -y docker-ce docker-ce-cli containerd.io docker-buildx-plugin docker-compose-plugin
Create the Docker Compose File
Create a directory for Beszel and set up your docker-compose.yml file.
mkdir ~/beszel && cd ~/beszel
nano docker-compose.yml
Paste the following configuration into the file. One more thing to note: no key is needed for installation. After installation, when you add a system, copy the public key and paste it into this file.
services:
  beszel:
    image: 'henrygd/beszel'
    container_name: 'beszel'
    restart: unless-stopped
    ports:
      - '8090:8090'
    volumes:
      - ./beszel_data:/beszel_data
    extra_hosts:
      - 'host.docker.internal:host-gateway'

  beszel-agent:
    image: 'henrygd/beszel-agent'
    container_name: 'beszel-agent'
    restart: unless-stopped
    network_mode: host
    volumes:
      - /var/run/docker.sock:/var/run/docker.sock:ro
    environment:
      PORT: 45876
      KEY: 'YOUR_KEY_HERE'
Save and exit the file.
Start the Hub and Get Your Public Key
Next, we understand how to add a system and how to get the public key.
First, start the hub using the command below.
sudo docker compose up -d beszel
Then open your browser and paste the link below and replace YOUR_SERVER_IP with your server's IP.
http://YOUR_SERVER_IP:8090
Then a page will open like the image below. Create your admin account here.
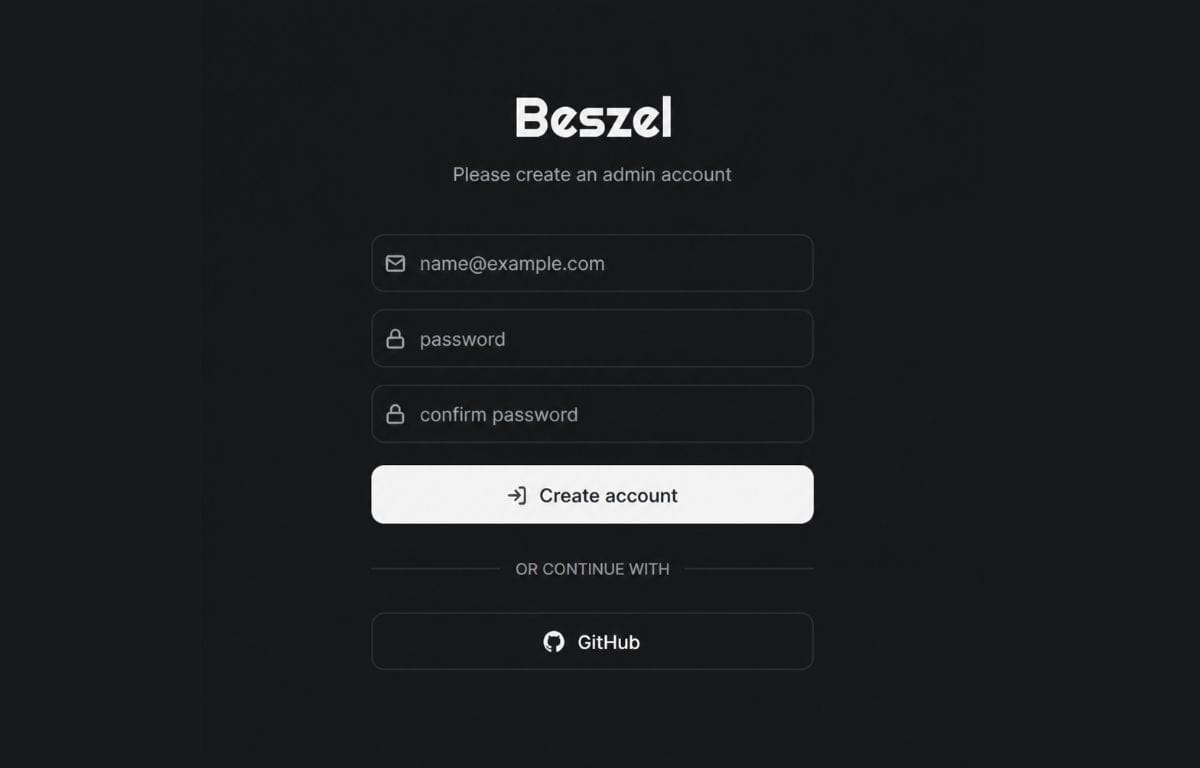
After opening the Beszel home page, click on +Add System. A page will open — fill in the details as shown in the image below and copy your Public Key.
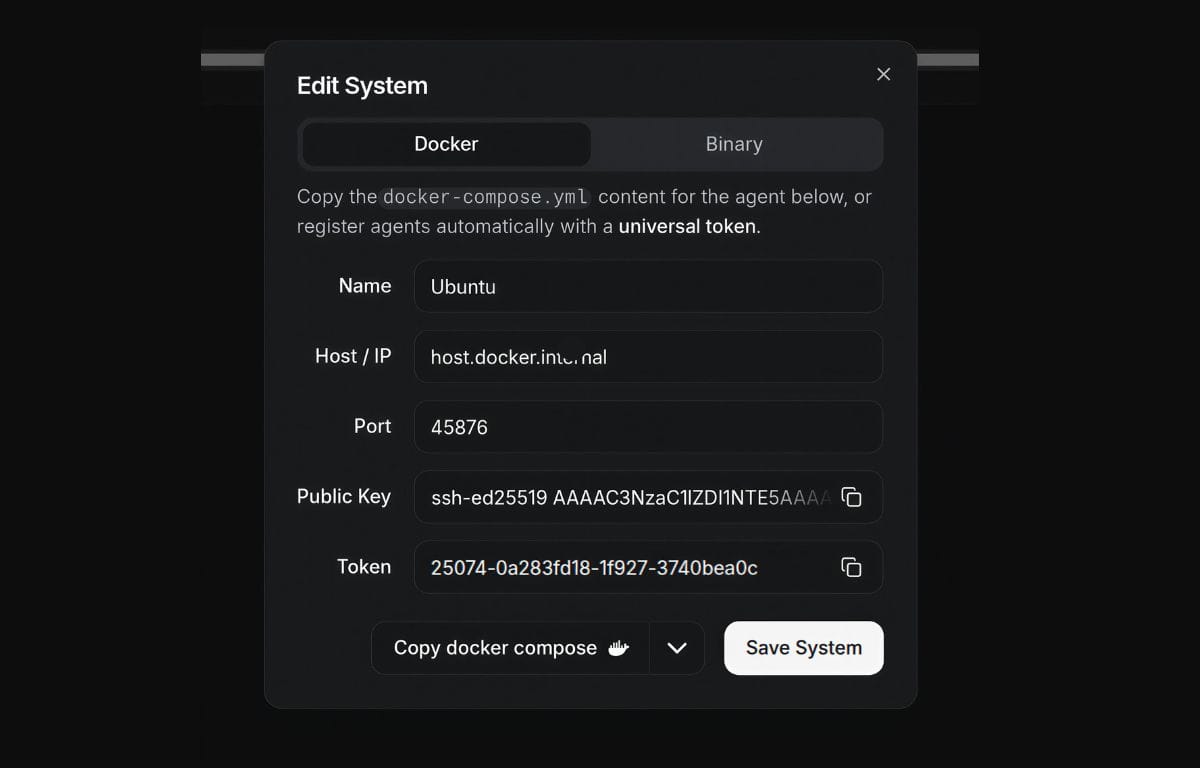
Then save the system. For the Host/IP, enter host.docker.internal instead of 127.0.0.1.
Start the Agent
Now that you have your Public Key, let's start the agent. First, open your compose file again.
nano docker-compose.yml
Replace 'YOUR_KEY_HERE' under the beszel-agent environment block with the key you just copied, like ssh-ed25...., then save and exit.
Start the agent:
sudo docker compose up -d
Then go back to your browser after a few minutes and refresh the page. The "down" dot will turn "green".
Key Features to Check Out Once Installed
Once you have Beszel running, it is packed with built-in tools. Here we explore some features of Beszel.
Live Uptime Monitoring
In Beszel, you can see whether your Virtual Machine or server is online or offline — just look at the System dashboard. It shows simple indicators.

A green dot means the system is "Up" and a red dot means the system is "Down".
Built-in Alerting
You don't need a PhD in PromQL to get notified when something breaks in your system. You can set up alerts in Beszel so it automatically notifies you via Email, Pushover, or any custom Webhook the moment a system goes down, CPU spikes, or your disk fills up.
Live Docker Container Logs
You can view live logs for individual Docker containers on the dashboard. When you click on a specific system in Beszel, you can view container status, health, and pull up their basic logs. You don't need to open your terminal for that.
Host System Logs
Beszel also features a "Logs" tab on the system details page. Here you can see your individual containers or server logs. This pulls the last 200 lines of your host's system journal logs live from the agent. In the dashboard, at the top, you will see a containers option — click on it to open all your containers. Then you can view the logs of any virtual machine you want.
Conclusion
Beszel is a self-hosted, lightweight tool that gives you Grafana-level insights with Uptime Kuma-level simplicity. You can watch live containers and Docker logs instantly. It's lighter than Grafana, but way more useful than a simple uptime kuma.
