
Odoo is one of the most powerful open-source tools for Enterprise Resource Planning (ERP). Whether you are managing a small or large business, Odoo provides comprehensive applications including CRM, Sales, Accounting, HR, Manufacturing, and more. Odoo looks good and is easy to use. So here, installing Odoo 19 on Ubuntu 24.04 server is the best thing.
Why Choose Odoo 19?
Before installation, we need to understand why installing Odoo 19 is worth it. Odoo is an open-source tool, which provides 50+ free business apps on one platform. Odoo is self-hosted and gives you complete control over your data. It is based on Python, so it is easy to customize and extend. In Odoo, some applications are not free, which is the only downside. But in Odoo, all applications are colorful and have great animations.
System Requirements
- OS : Ubuntu 24.04
- CPU: 2 cores
- RAM: 4GB minimum
- Storage: 25GB
Update Your System
In Linux, when you start any installation, we first need to update and upgrade the system. So here we update and upgrade our Ubuntu server using the below command.
sudo apt update && sudo apt upgrade -y
Install Required Dependencies
Odoo 19 requires several system libraries and tools to function correctly. Install all tools using one command.
sudo apt install -y git python3-pip build-essential wget python3-dev \
python3-venv python3-wheel libfreetype6-dev libxml2-dev libzip-dev \
libldap2-dev libsasl2-dev python3-setuptools node-less libjpeg-dev \
zlib1g-dev libpq-dev libxslt1-dev libldb-dev libtirpc-dev
Create a Dedicated Odoo System User
In Linux, any new system installation should be done by a new user for security. So here we will not go with root and will create the user odoo. You can change the username here according to your work. Replace odoo with your preferred name if you want to change your username.
sudo useradd -m -d /opt/odoo -U -r -s /bin/bash odoo
Above one command, we create a user, their directory, a group, and set the default shell for the user.
Install and Configure PostgreSQL
Odoo uses PostgreSQL as its database engine. Ubuntu 24.04 comes with PostgreSQL 16, which is fully compatible with Odoo 19.
Install PostgreSQL
sudo apt install -y postgresql
Start PostgreSQL service
sudo systemctl start postgresql
Enable PostgreSQL to start on boot
sudo systemctl enable postgresql
Create a PostgreSQL user for Odoo
sudo -u postgres createuser -s odoo
Install Wkhtmltopdf
Wkhtmltopdf is an open-source, command-line tool that converts HTML web pages and files into PDF documents. Here, we use Wkhtmltopdf for generating PDF reports like invoices, delivery slips, etc. For this, we navigate to the temp directory, then download wkhtmltopdf and install the package.
Navigate to temp directory
cd /tmp
Download wkhtmltopdf
wget https://github.com/wkhtmltopdf/packaging/releases/download/0.12.6.1-3/wkhtmltox_0.12.6.1-3.jammy_amd64.deb
Install the package
sudo apt install -y ./wkhtmltox_0.12.6.1-3.jammy_amd64.deb
If you want to verify wkhtmltopdf installation then use below command.
wkhtmltopdf --version
here output show like wkhtmltopdf 0.12.6.1 (with patched qt).
Download Odoo 19
Now we download Odoo 19 from the official GitHub repository. First, we switch to the odoo user. Here, replace your username with odoo.
Switch to the odoo user
sudo su - odoo
Clone Odoo 19 repository
git clone https://github.com/odoo/odoo \
--depth 1 --branch 19.0 /opt/odoo/odoo19
Here we dowload latest version of odoo without full git history.
Create a Python Virtual Environment
Here we create a Python virtual environment for Odoo 19. We create a virtual environment for Python.
Create virtual environment
python3 -m venv /opt/odoo/odoo19-venv
Activate the virtual environment
source /opt/odoo/odoo19-venv/bin/activate
Install Python Dependencies
We install Odoo 19 on Ubuntu 24.04 and Ubuntu 24.04 has Python 3.12 by default. So we don't need to change it. We install all required Python packages in a virtual environment.
Install wheel first
pip install wheel
Install all Odoo Python requirements
pip install -r /opt/odoo/odoo19/requirements.txt
Deactivate virtual environment when done
deactivate
This is done then we return to our sudo user using below command.
exit
Configure Odoo
Create and configure the main Odoo configuration file for Odoo 19 installation on Ubuntu server
Create configuration directory
sudo mkdir /etc/odoo
Create configuration file
sudo touch /etc/odoo/odoo.conf
Open for editing
When you enter the below command, it opens one blank file. Select all the following configuration and paste it into the blank file.
sudo nano /etc/odoo/odoo.conf
Note: Replace your_admin_password with a strong and unique password. This password is required when opening the Odoo home.
Add the following configuration:
[options]
; Master password for database operations
admin_passwd = your_admin_password
db_host = False
db_port = False
db_user = odoo
db_password = False
addons_path = /opt/odoo/odoo19/addons
Then press ctrl+Y then Y for save file.
Create a Systemd Service File
Now we create a systemd service file, which allows Odoo to start automatically
sudo nano /etc/systemd/system/odoo.service
Paste same as below content in file:
[Unit]
Description=Odoo19
Requires=postgresql.service
After=network.target postgresql.service

[Service]
Type=simple
SyslogIdentifier=odoo19
PermissionsStartOnly=true
User=odoo
Group=odoo
ExecStart=/opt/odoo/odoo19-venv/bin/python3 \
/opt/odoo/odoo19/odoo-bin -c /etc/odoo/odoo.conf
StandardOutput=journal+console

[Install]
WantedBy=multi-user.target
Then press ctrl+Y then Y for save file.
Enable and Start Odoo Service
We use the below commands to reload, enable, and start the Odoo service.
sudo systemctl daemon-reload

sudo systemctl enable odoo
sudo systemctl start odoo
Now we verify Odoo service using below command:
sudo systemctl status odoo
Expected Output:
odoo.service - Odoo19
Loaded: loaded (/etc/systemd/system/odoo.service)
Active: active (running) ✅
Access Odoo in Your Browser
Open your web browser, paste the command below, and replace your server IP in the command.
http://your_server_ip:8069
When you paste this, replacing it with your server IP, your Odoo home page will open.
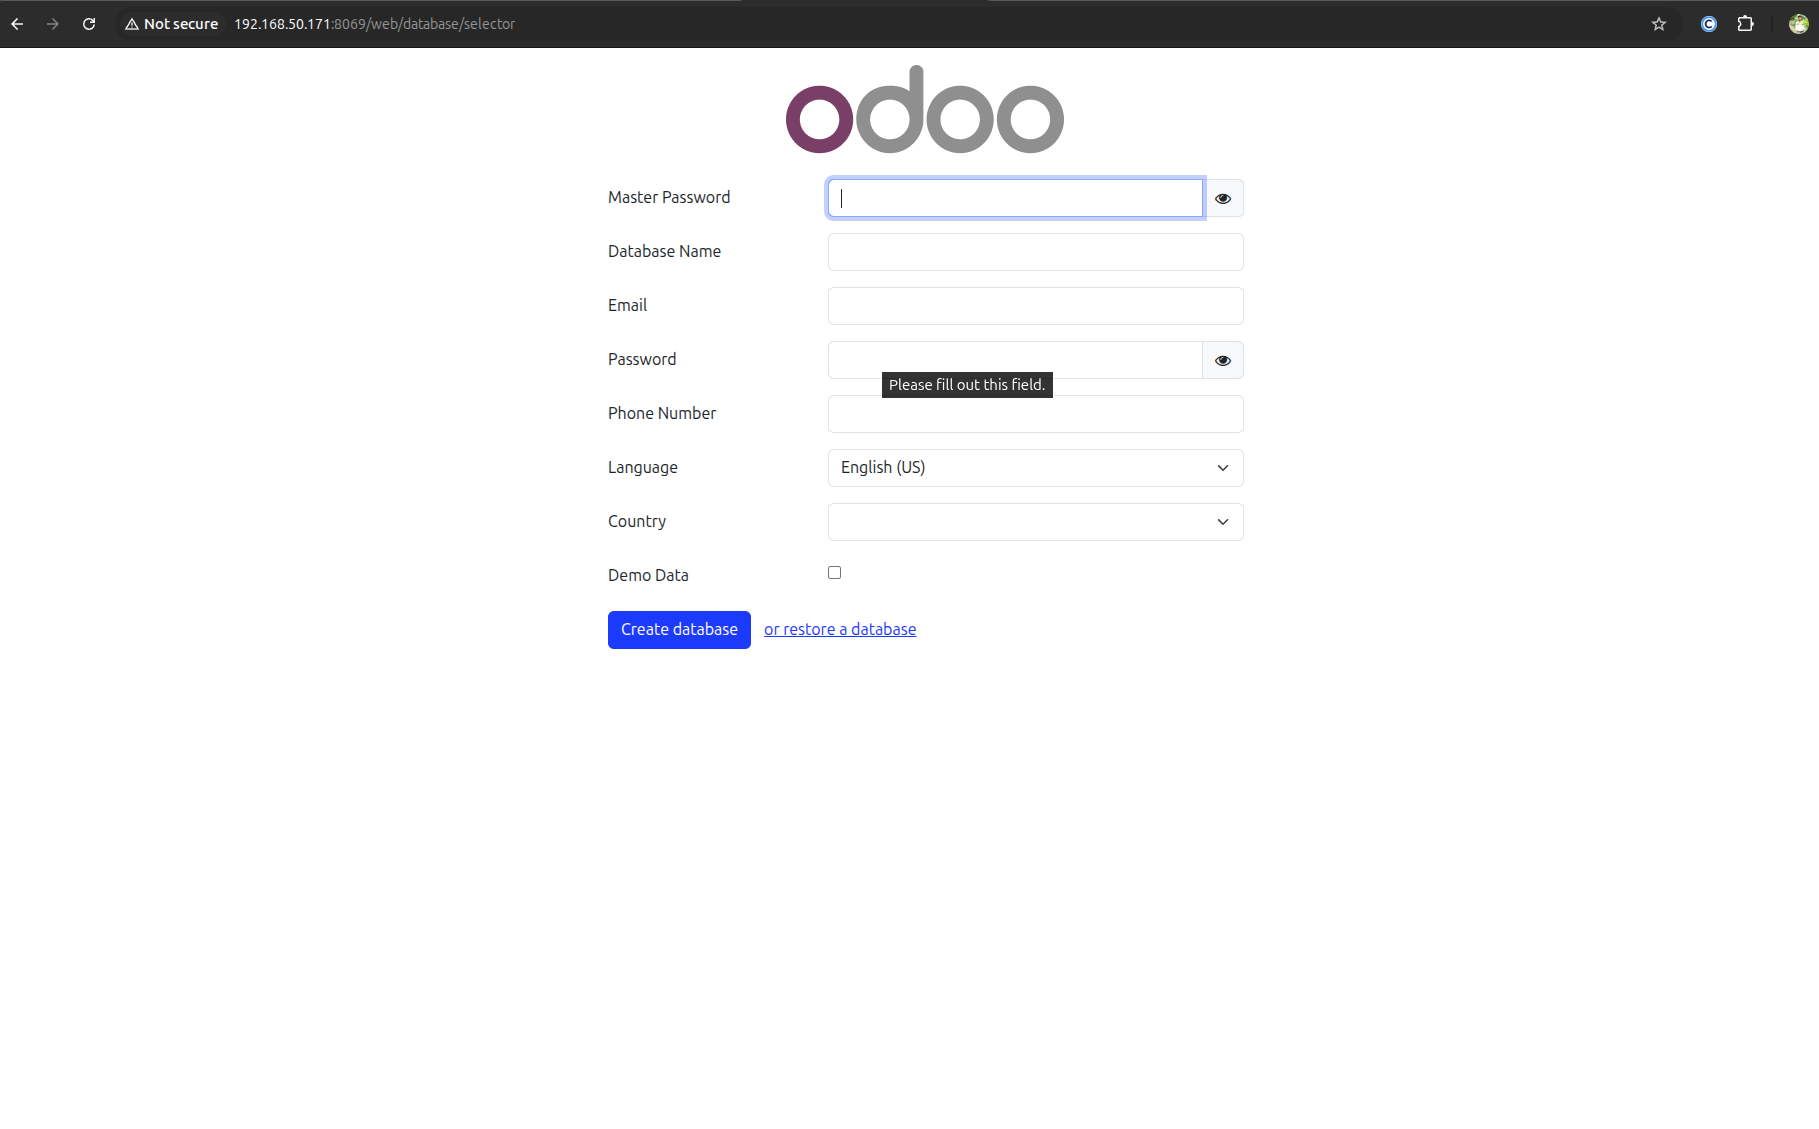
When your Odoo home page opens, your Odoo 19 has been successfully installed on the Ubuntu 24.04 server.
On the Odoo home page, enter all data as shown below. After entering all data on the home page of Odoo, wait a few minutes.
- Master Password: you set it up at "admin_password = your_admin_password"
- Database Name : mycompany
- Email : [email protected]
- Password : you can set any strong password
- Language :
- Country :
- Demo Data : Unchecked for production
Then you successfully launched Odoo.
