
Setting up a home server today is like building a high-security vault. In the modern day, hackers use automated scanners that can find and attack your unprotected systems within minutes. To stay safe, you must design your server with an "assume breach" mentality. This means setting up your network as if a hacker is already trying to get in, creating strict digital walls around every application. If an attacker successfully breaks into one specific service, they are immediately trapped in that box and blocked from accessing the rest of your files, computers, or devices. That is why we guide you here on how to secure your home server.
Virtualization and Isolation
Never run apps directly on your computer's main operating system. Instead, dedicate your host system entirely to running virtual machines and containers.
To secure your home server, install Proxmox VE, which allows you to divide your various services logically rather than piling all your Docker containers onto a single Linux machine. For lightweight services like Pi-hole or a reverse proxy, deploy on Linux Containers because they efficiently share the system kernel while keeping their file systems completely separated. For critical infrastructure like your firewall, or any service that demands maximum security, use full Virtual Machines to achieve heavy isolation.
By separating your applications from the hardware, you create strong security barriers. If a hacker exploits a vulnerability in your media server, they are trapped in a restricted container and cannot see your password manager running right next to it. This also allows you to take full snapshot backups. If an update breaks your container, you can fix a broken container in three seconds.
Network Segmentation (VLANs)
By default, your home network is a flat, trusting environment where your smart TV, your phone, and your server can all communicate with one another, creating a massive security risk.
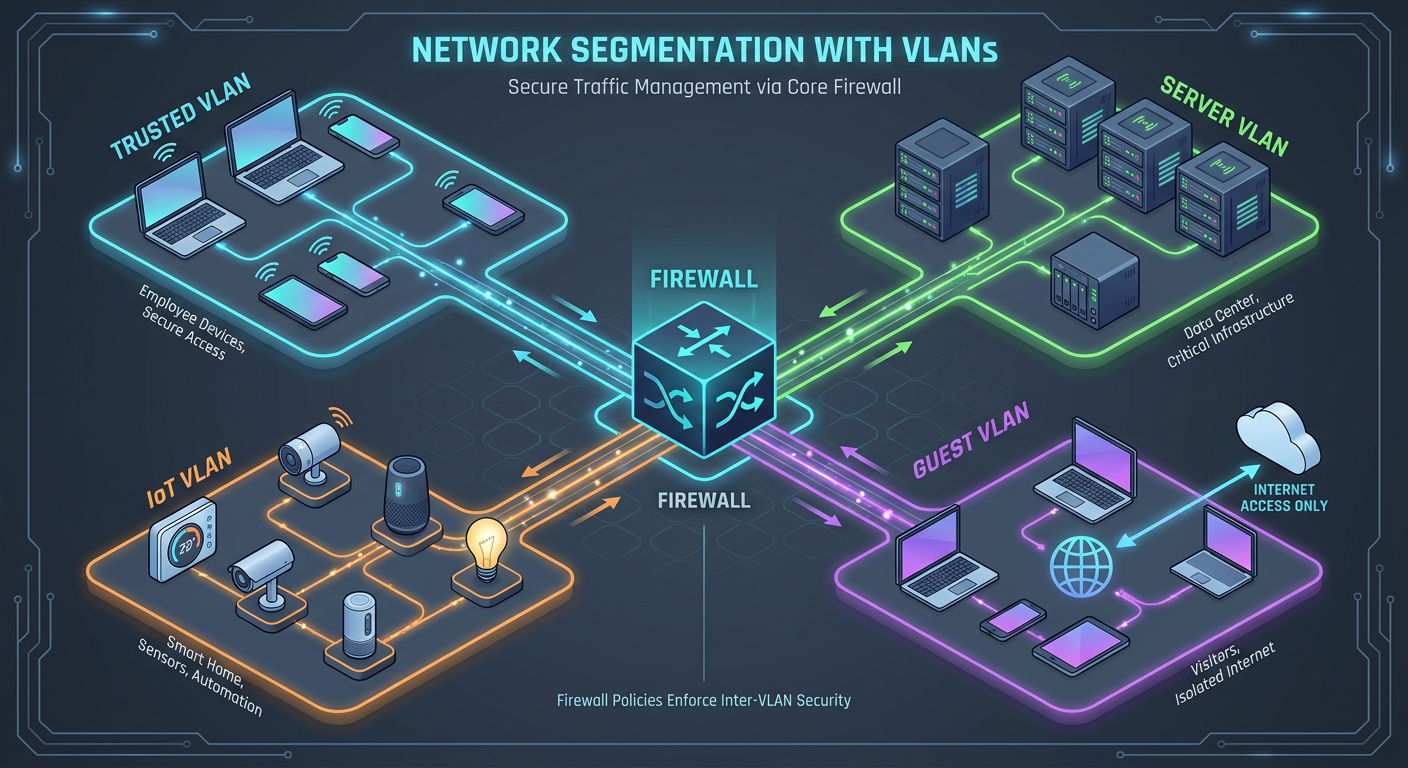
To fix this risk, you must use a managed switch and a dedicated firewall, such as OPNsense or pfSense, to slice your network into separate Virtual Local Area Networks (VLANs): VLAN 10 for trusted devices like laptops and phones; VLAN 20 for servers like your Proxmox host, NAS, and Docker VMs; VLAN 30 for IoT devices like smart TVs and cameras; and VLAN 40 for guests, providing internet access only with zero local connectivity.
Configure your firewall rules to a "Default Deny" policy. Under this setup, the IoT VLAN is completely blocked from starting a connection to any other network, and while devices on the Trusted VLAN can talk to the Server VLAN, the Server VLAN is forbidden from initiating traffic back to your trusted devices. This strict separation ensures that if your server is ever compromised, the attacker is completely blocked from scanning or attacking your laptop.
The End of Port Forwarding
Opening ports on your router is the equivalent of leaving your front door unlocked, and you must stop doing it entirely.
For internal management tasks like accessing SSH, the Proxmox UI, or internal dashboards, you should deploy an overlay network like Tailscale or WireGuard to create a secure mesh network. By installing Tailscale on both your phone and your server, they connect peer-to-peer using strong WireGuard cryptography, allowing you to access your server's local IP address from anywhere in the world while remaining completely invisible to the public internet.

For external sharing of public-facing services like Plex, Nextcloud, or game servers with friends, you should use Cloudflare Tunnels instead. You achieve this by installing the cloudflared client inside a lightweight Proxmox LXC container, which establishes a secure outbound connection to Cloudflare's edge network. From there, you map your personal domain name to that tunnel, allowing Cloudflare to handle the SSL certificate, hide your home IP address entirely, and provide enterprise-grade DDoS protection—all without opening a single inbound port on your router.
Identity and Access Management
Do not rely on the built-in login screens of your various self-hosted applications, as they are prime targets for brute-force attacks.
You should place all your applications behind a reverse proxy like Nginx Proxy Manager or Traefik, and integrate it with a central Identity Provider like Authelia or Authentik.
With this setup, whenever you try to open any of your apps, the central system blocks you first. It forces you to log into one single webpage using a secure physical key (like a YubiKey) or a code from an authenticator app on your phone. You only get access to your actual apps after you pass this single, ultra-secure checkpoint.
OS-Level Hardening
Even with isolated containers and zero open ports, your base operating systems still require strict security hardening.
First, kill password authentication entirely by editing your /etc/ssh/sshd_config file and setting PasswordAuthentication no. Instead, generate secure Ed25519 SSH keys on your laptop and copy the public key to your servers, because traditional passwords can be brute-forced while SSH keys cannot.
If you must use Docker, you need to configure and run it in rootless mode. By default, the Docker daemon runs with root privileges, meaning a container breakout would grant an attacker complete control over your host system. Rootless Docker restricts everything to a standard user account.
Finally, implement an active defense with CrowdSec, as older tools like Fail2ban are outdated. CrowdSec parses your system logs in real-time to identify malicious behaviors like brute-forcing or port scanning, and automatically blocks those offending IPs at the firewall level. Because its threat intelligence is crowdsourced, if a malicious IP attacks another server on the global CrowdSec network, your server will proactively block that IP before it even attempts to hit your system.
Immutable Backups
Ransomware does not care if you have a mirrored RAID array, as it will simply encrypt your files and mirror those encrypted files across your drives. To properly protect yourself, you must follow the 3-2-1 backup rule: maintain 3 separate copies of your data, stored on 2 different types of media, with 1 copy kept offsite.
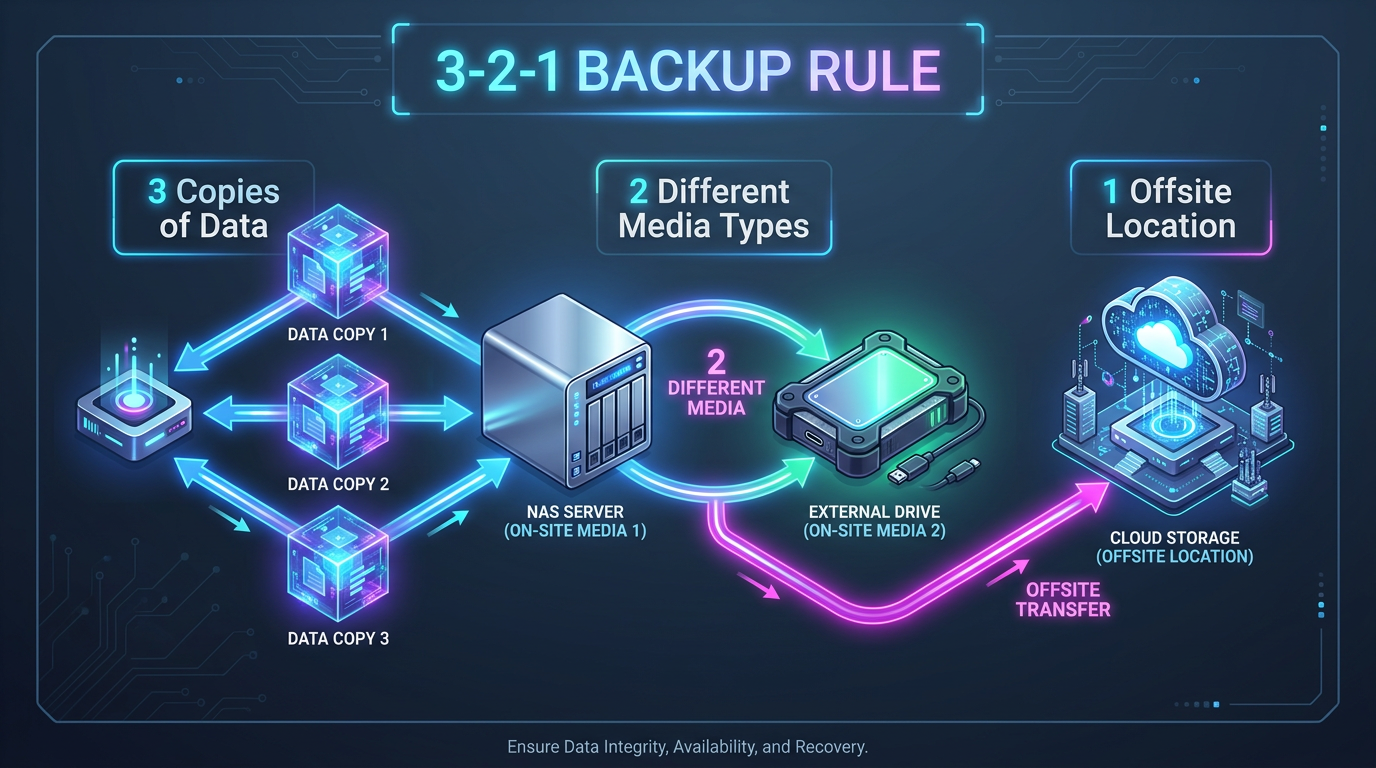
Start by spinning up a Proxmox Backup Server (PBS) instance, which supports deduplication and incremental backups so it only saves the specific blocks of data that have changed since the previous day. Next, configure a sync job within PBS to securely push an encrypted copy of your backups to an offsite, S3-compatible cloud storage provider like Backblaze B2 or AWS Glacier.
Finally, enable "Object Lock" on that cloud storage bucket to make your backups completely immutable; this ensures that even if an attacker manages to compromise your local backup server and attempts to wipe out your offsite data, the cloud provider will strictly refuse the deletion command for a predetermined time frame, such as 30 days.
